
Work of double curvature, or how to bend handrail the way it doesn’t go.
Posted on 12 May 2011
Mary Horst, of Horst Buchanan Architects, Inc., approached me in November of 2010 about reworking a stair in an early ’80s condominium in Jamaica Plain, MA. The original stair was open, giving the new homeowners visions of late-night tumbles, and the design had not aged well.
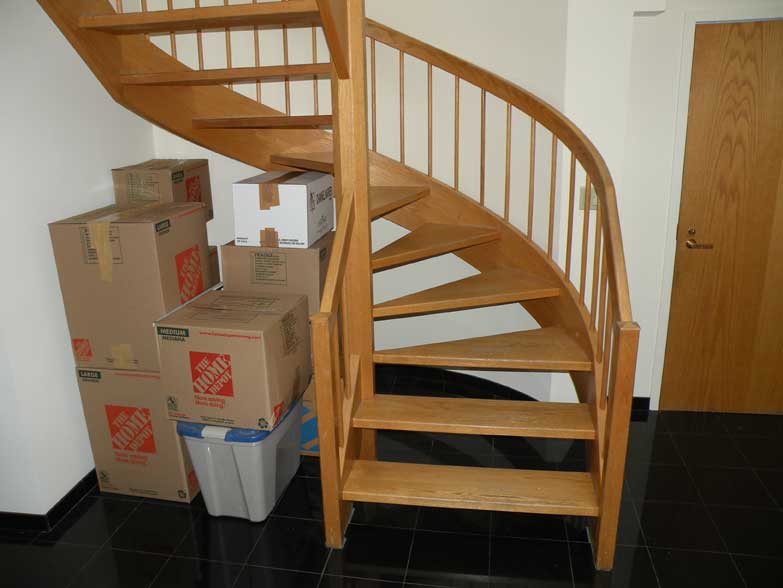
Budget and logistics required that the framework of the stair remain, but Mary wanted to add risers and half walls, and eliminate the oak balustrade. The biggest challenge of the job would be fabricating a new wall-mounted handrail.
Mary’s new design required a continuous, smoothly curving handrail with no visible joints. Because the stair transitioned from straight rise to curving rise and back again, the handrail would have to change pitch in addition to following the curve of the wall. We planned to make a bent lamination for the main curve, but the transitions would have to be individually carved.
Part 1 – Preparation
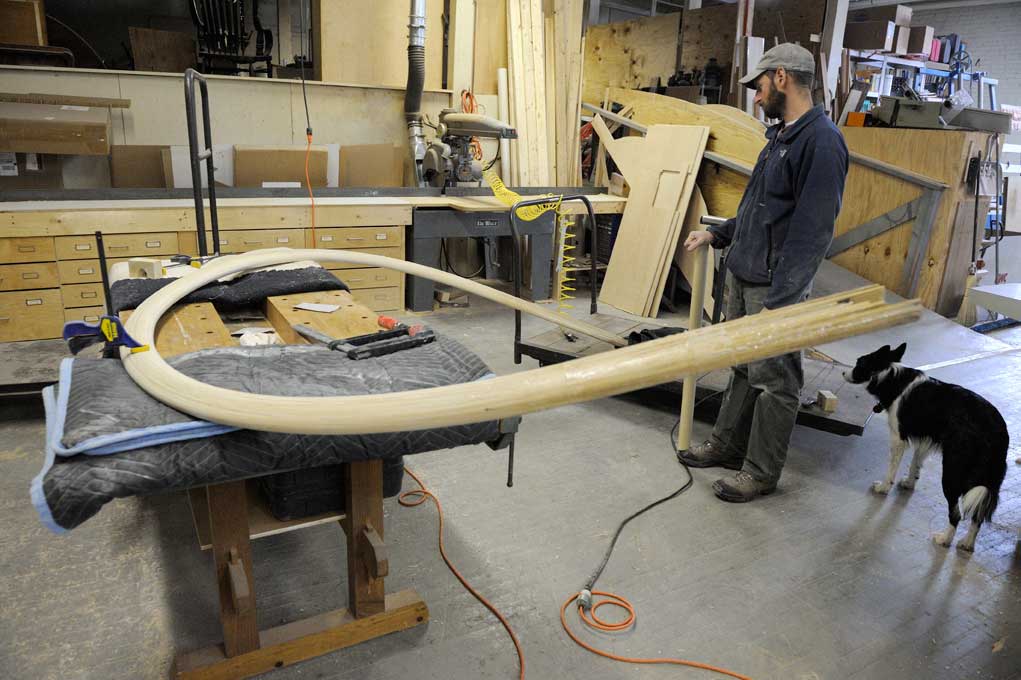
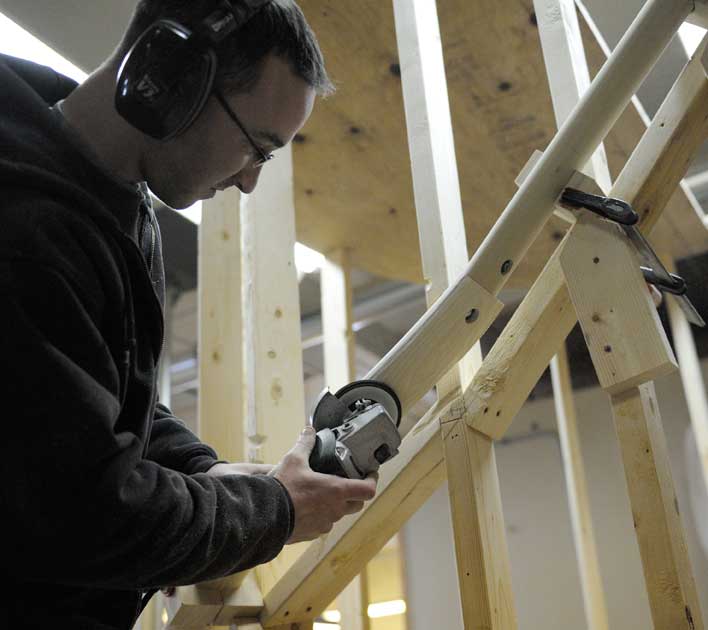
We started the project by carefully templating the existing stair in plan and elevation, so that we could replicate the shape in our shop.
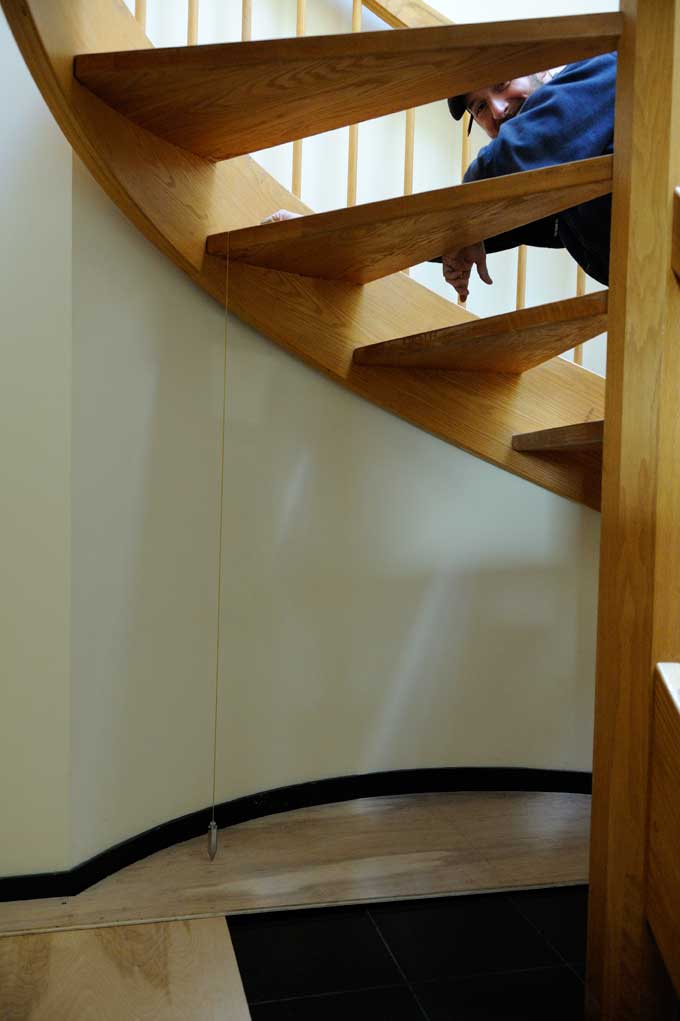
Tim and his plumb bob!
We mapped the shape of the outside stringer onto the luaun template and transferred the location in plan of all the treads. The we we made a story pole to give us the tread locations in elevation. From this information, we were able to build a bending form in the shop that mimicked the original stair.
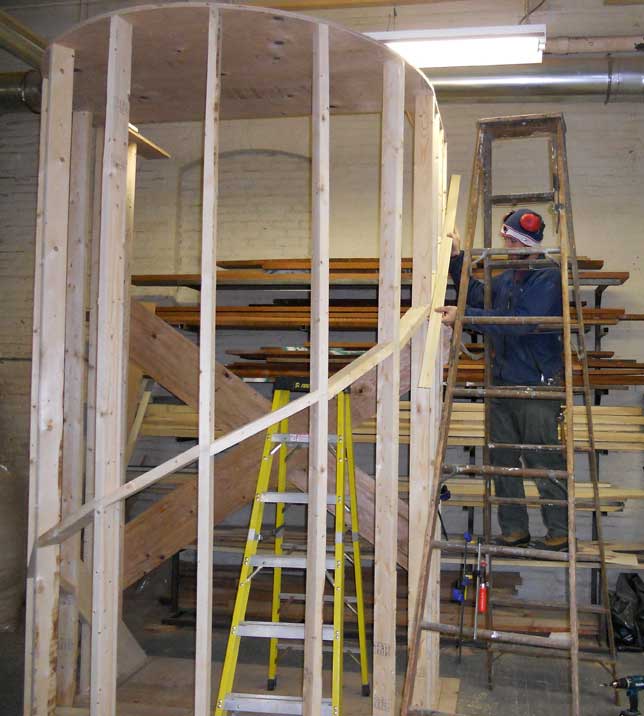
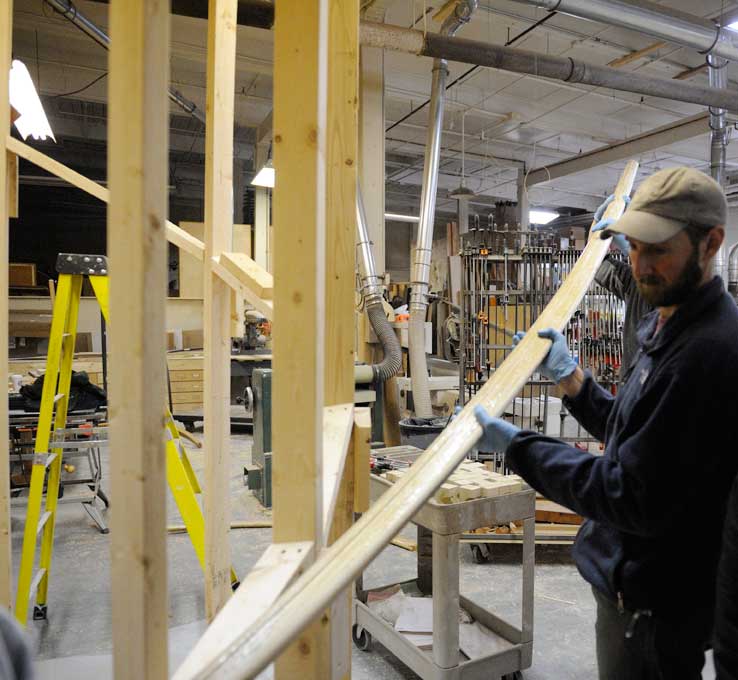
Our plan for the main curved railing was to mill straight sections of the handrail, cut them into strips, and then reassemble then on the form. In addition to the handrail itself, we would need blocks with opposite shape to clamp the bent lamination.
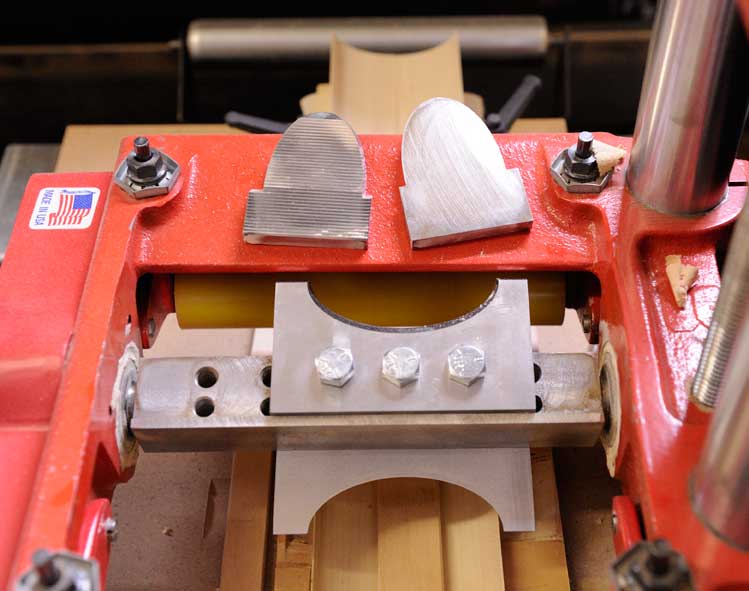
The Williams & Hussey molder with the handrail knives, and the shaper knives above for the clamping profile.
On to making sawdust!
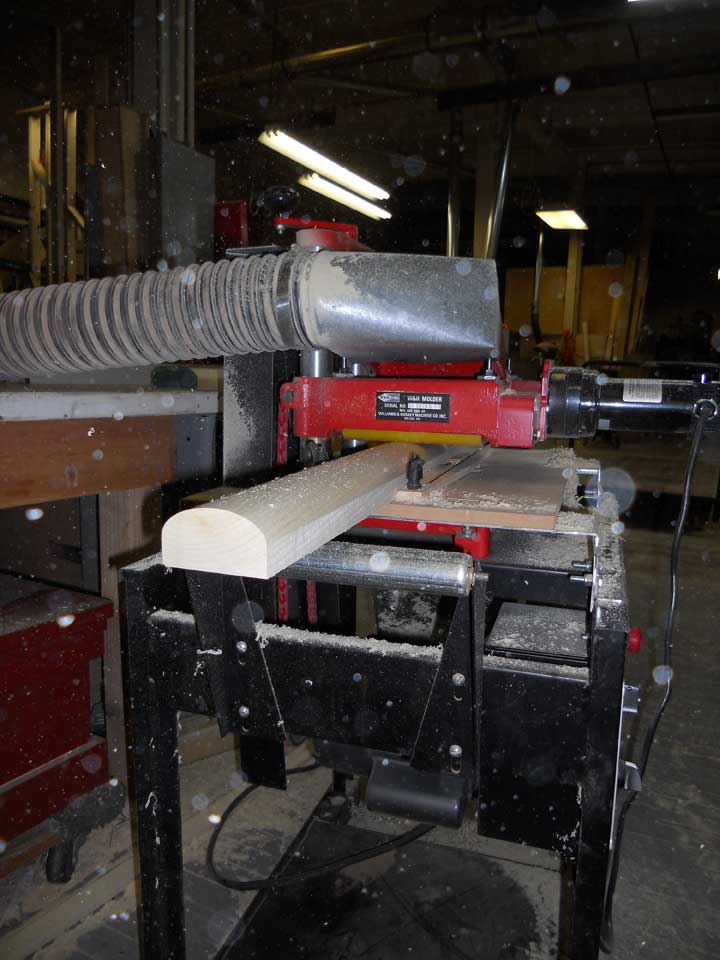
Milling the first side.
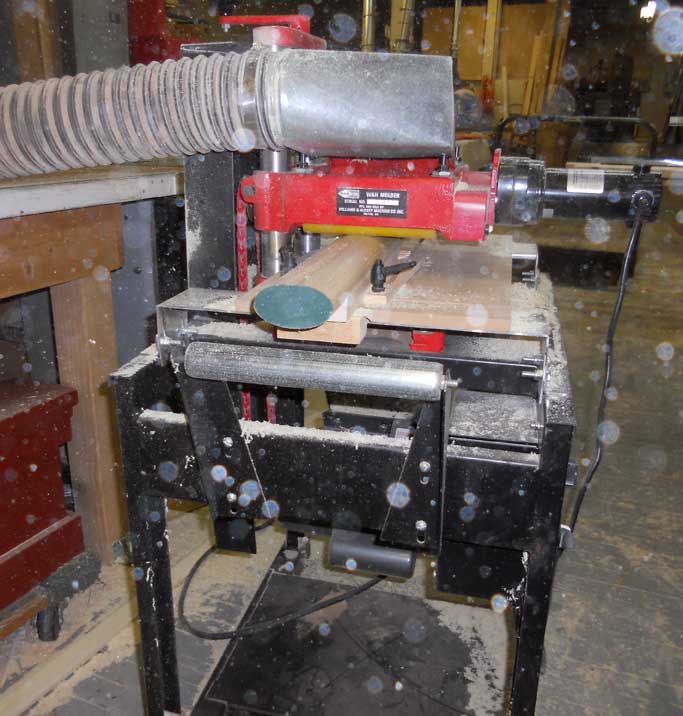
And the second side, with the clamping profile underneath as a cradle.
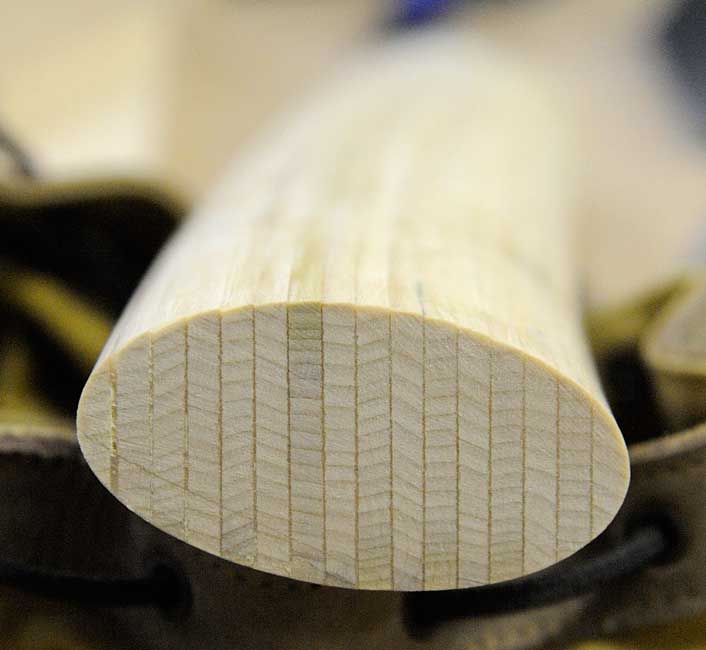
The completed profiles.
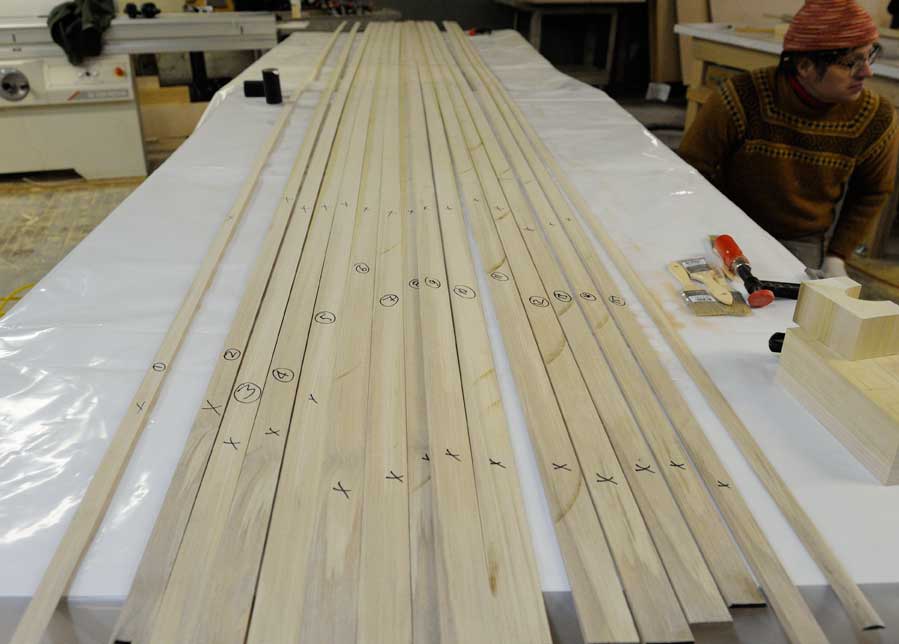
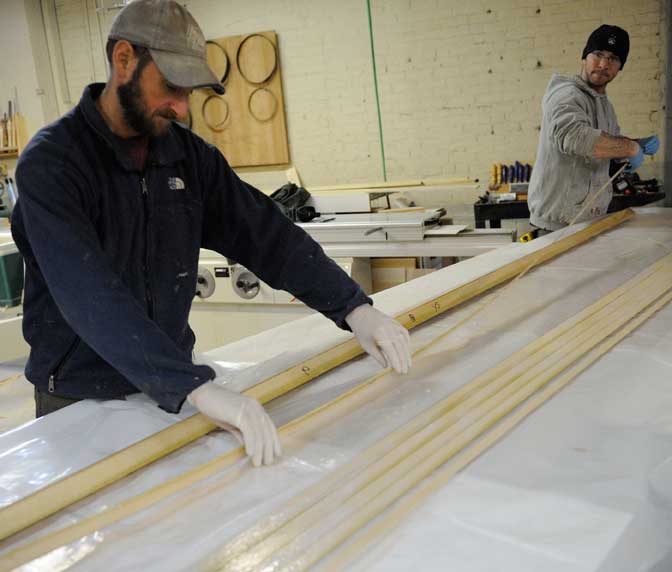
In order to make the curved handrail, we had to cut the handrail into strips thin enough to bend around the form. The problem is that some of the profile is lost to sawdust (the dreaded saw kerf!) each time we rip a strip from the solid handrail. In order to finish with a complete profile, we started with two handrail blanks, cutting alternate strips from each blank. Once cut, he strips got numbered and laid out in sequence, ready for glue.
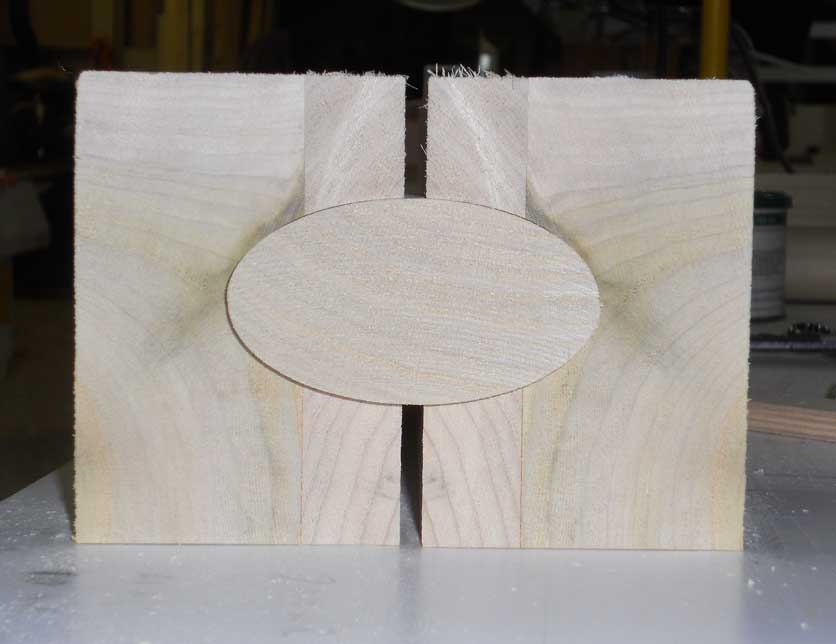
The last step before the glue-up was to cut and wax the clamping blocks.
Part 2 – The glue-up
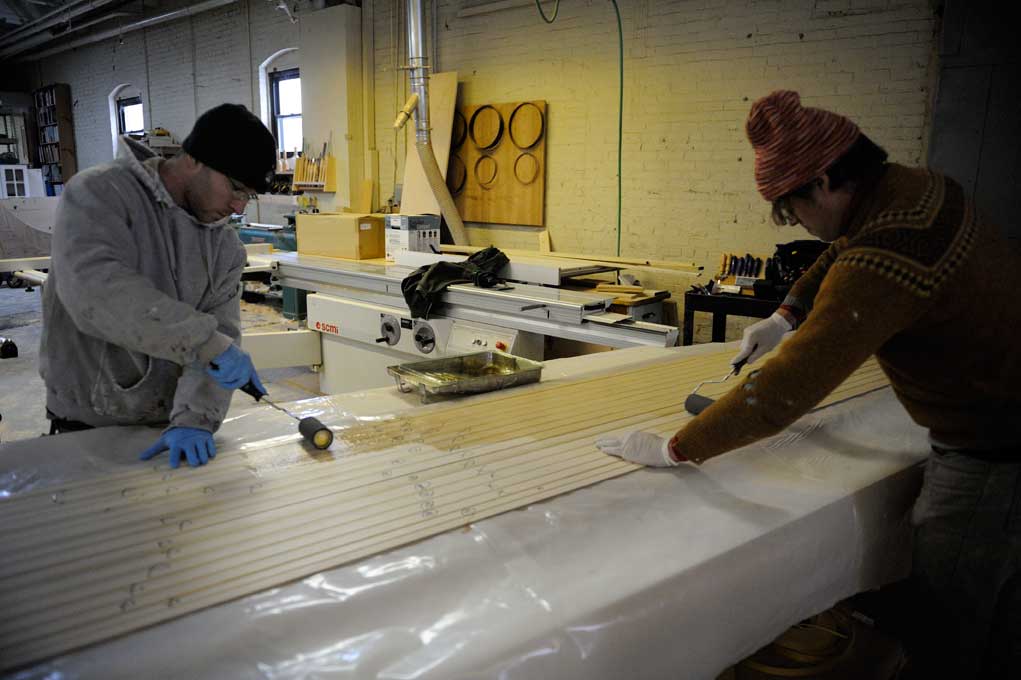
Anyone who imagines woodworking as an idyllic pastime has not been present for a large-scale glue-up. In this case, we had 16 poplar strips, all 16 feet long, which had to get glued, assembled into the right shape, and then bent around an alarmingly small radius, all while maintaining the precise pitch needed to match the existing stair. It’s the woodworkers’ ballet, requiring precise timing, movements, and coordination. Concentration is everything, so we never glue up in the hour before lunch, and never in the last few hours on a Friday. And supervision is critical:
All hands on deck, we started applying marine epoxy (West System) to the strips.
First unthickened epoxy.
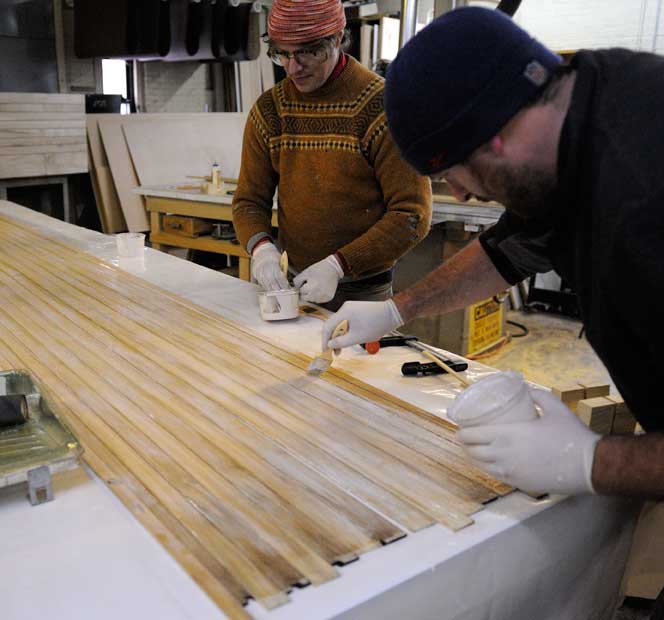
And then epoxy with a gap-filler.
We assembled the pieces on the bench:
Clamped it at the lower end:
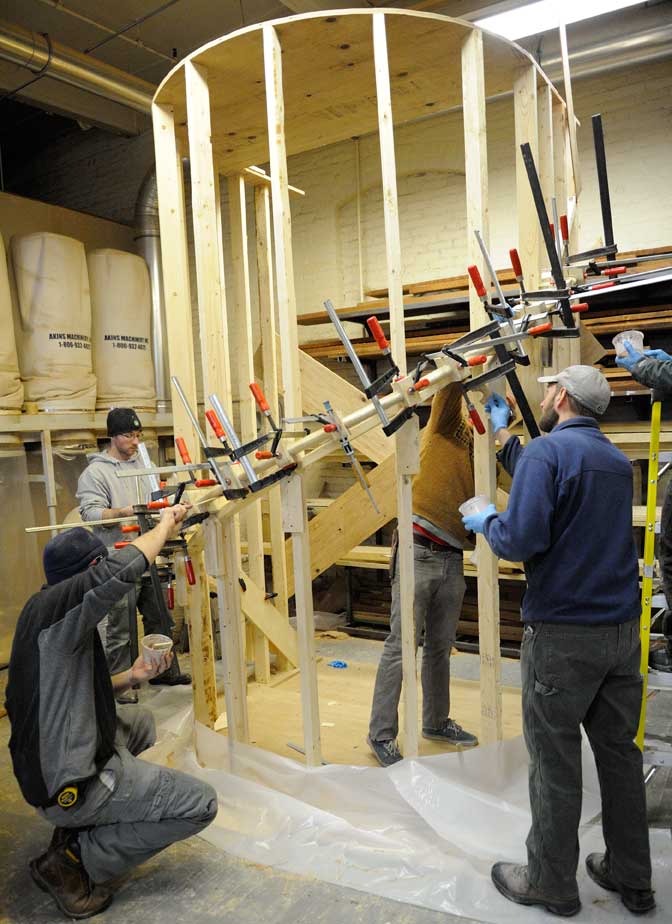
And carried it to the form:
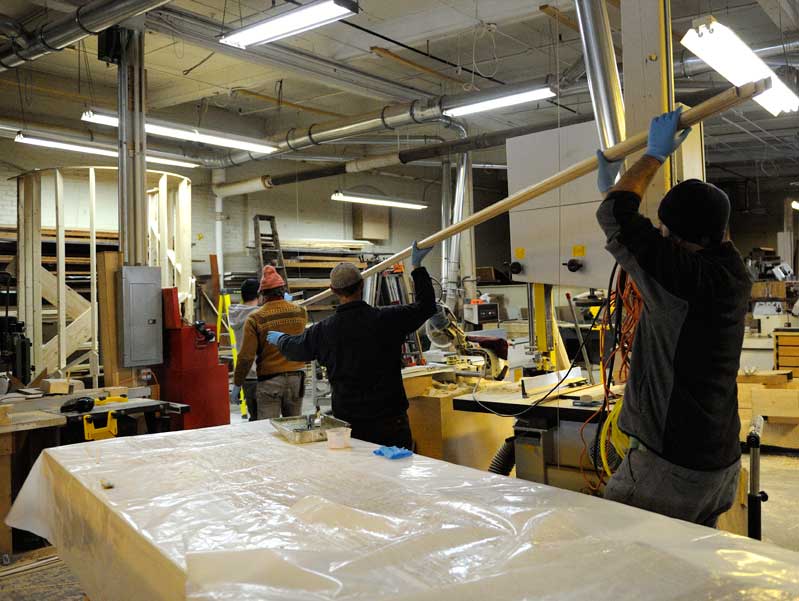
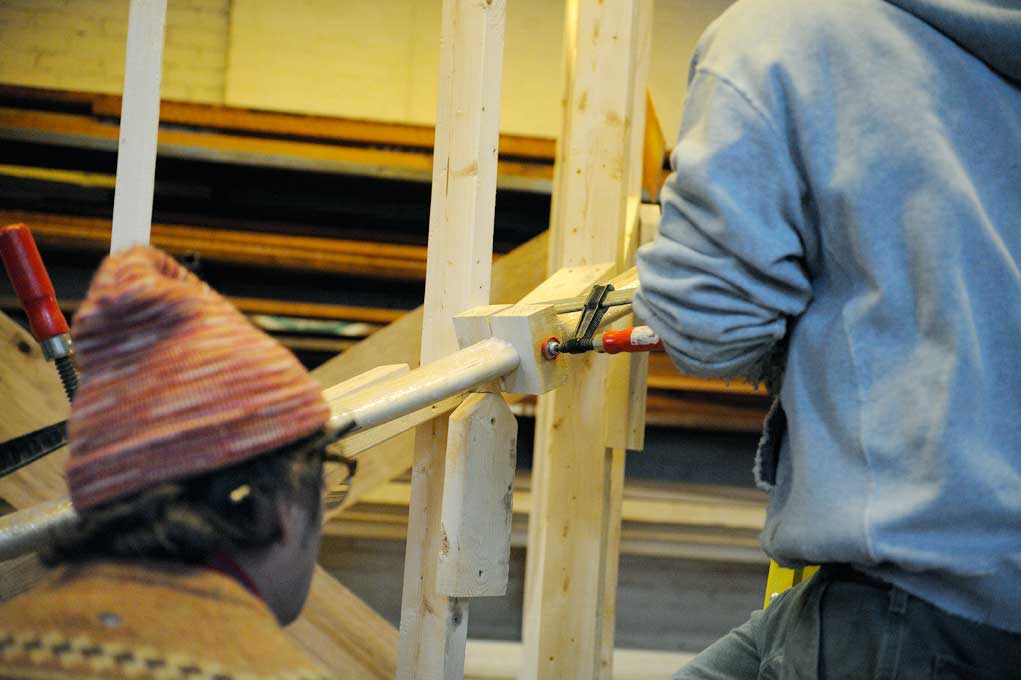
As we started to clamp the handrail strips on the form, we had to maintain a consistent spacing off the form, align with our reference guides (representing the nosing of each tread), and keep the profile level as it rose.
Aligning,
the final bend,
and cleanup:
We let the epoxy cure for a couple days on the form, and then took down the rail remove excess epoxy and sand it smooth.
As with all woodworking tasks, a contemplative frame of mind is crucial to success.
A look at the laminations:
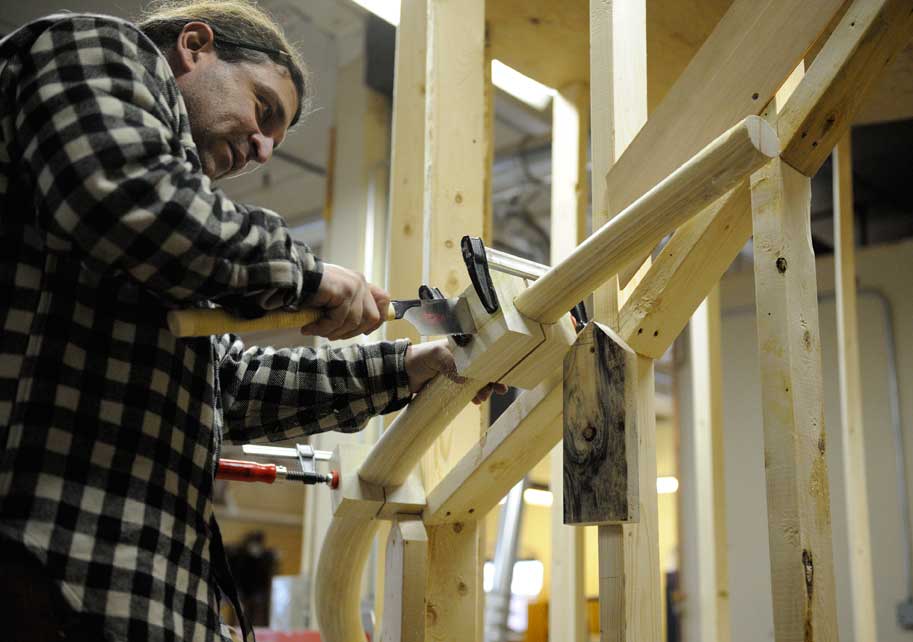
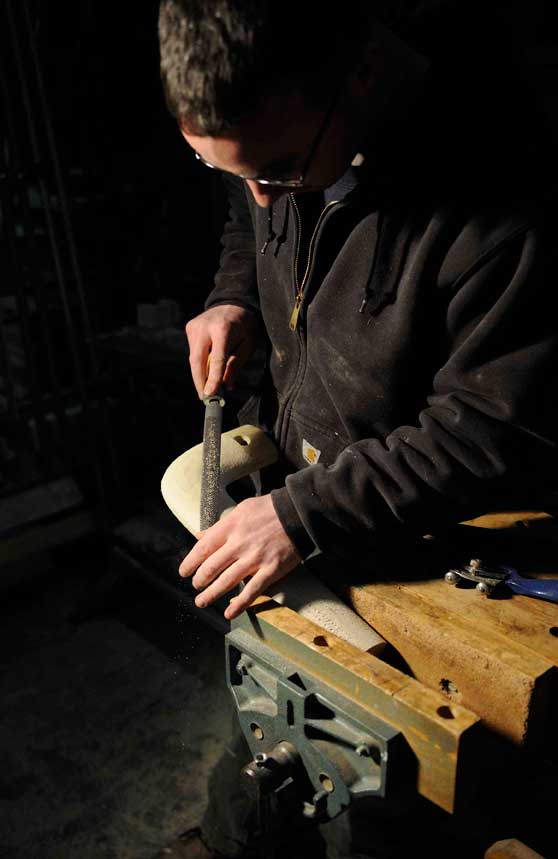
Part 3 – Transitions
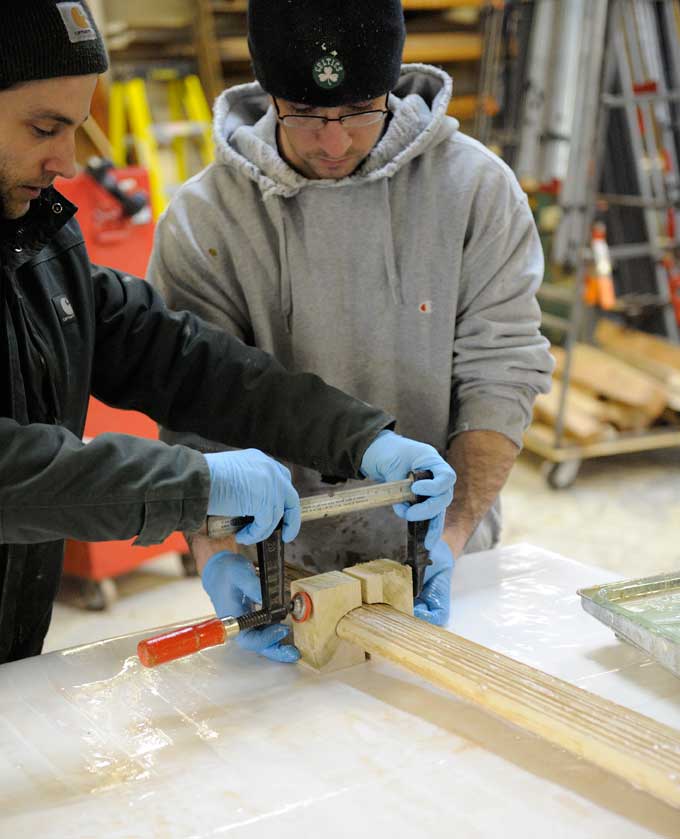
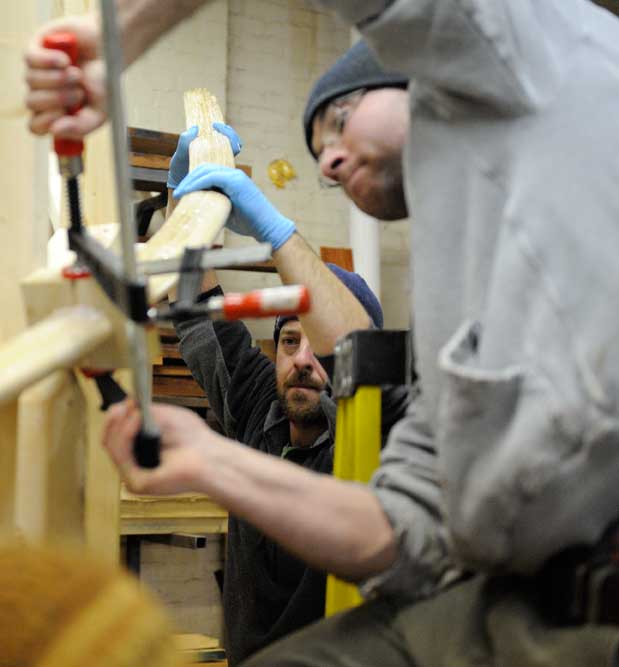
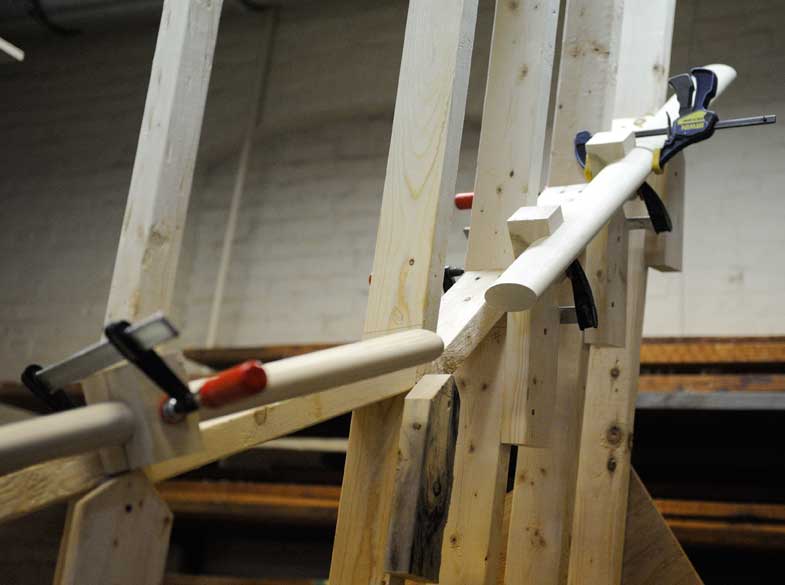
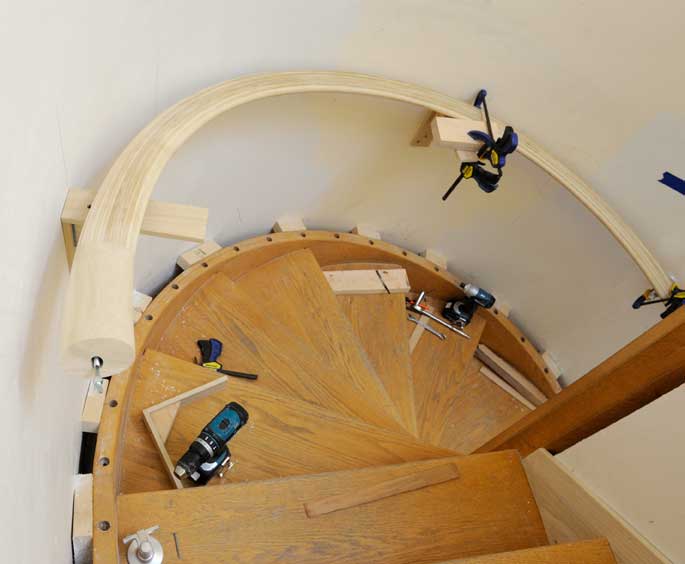
Once the main part of the rail was cleaned up, we clamped it again to the form so we could determine the locations for the transitions in slope. A deep breath, and we cut tangent to the curve.
(Let the above photo serve as evidence that I am still occasionally allowed to handle tools myself.)
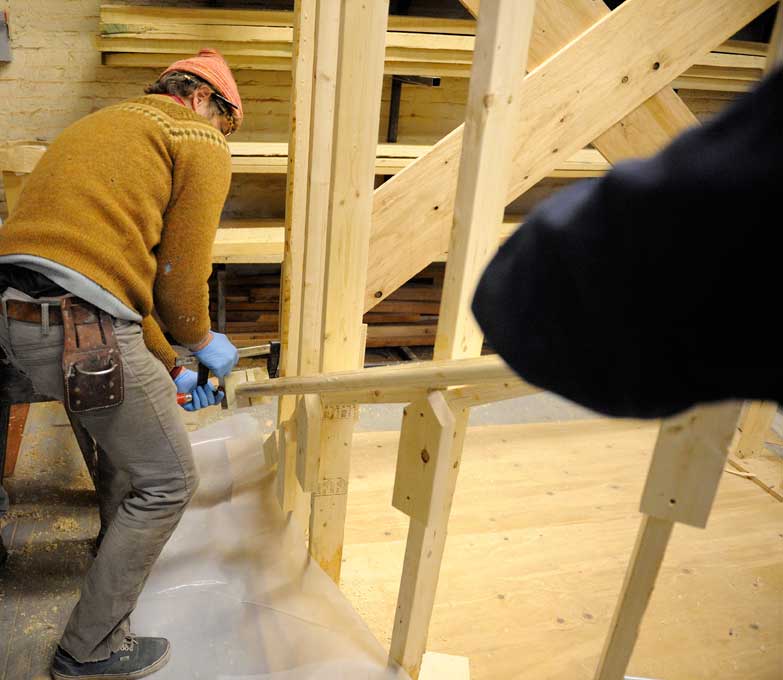
We clamped the straight railing section in place:
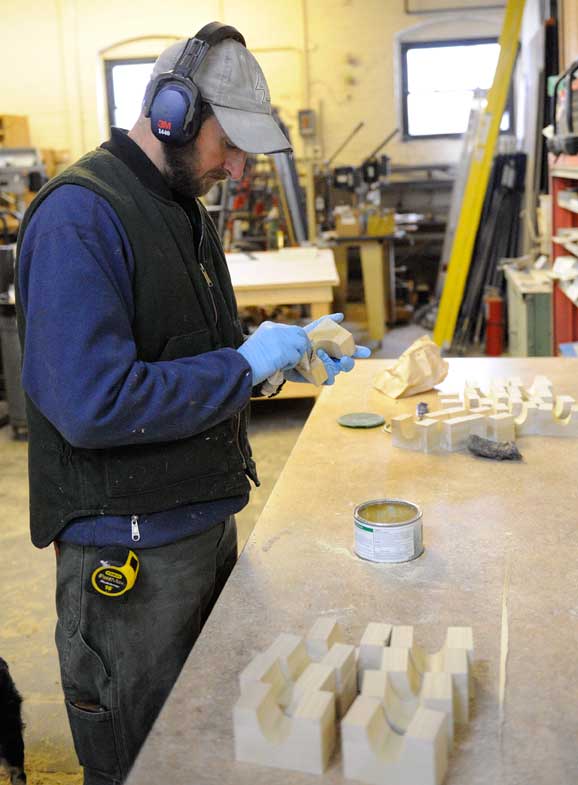
And carved the transition piece:
We also had to carve 90-degree returns for either end of the handrail.

Part 4 – Installation
As we drove to the job site with all the handrail parts, a little anxiety crept in — had Tim really gotten all those measurements right?
Apparently yes.
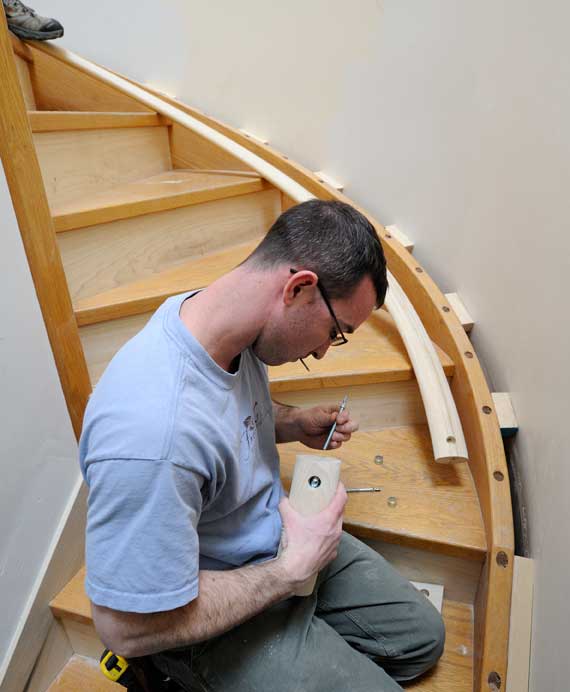
Assembling one of the transitional pieces with concealed handrail bolts.
Then flipping the rail right side up:

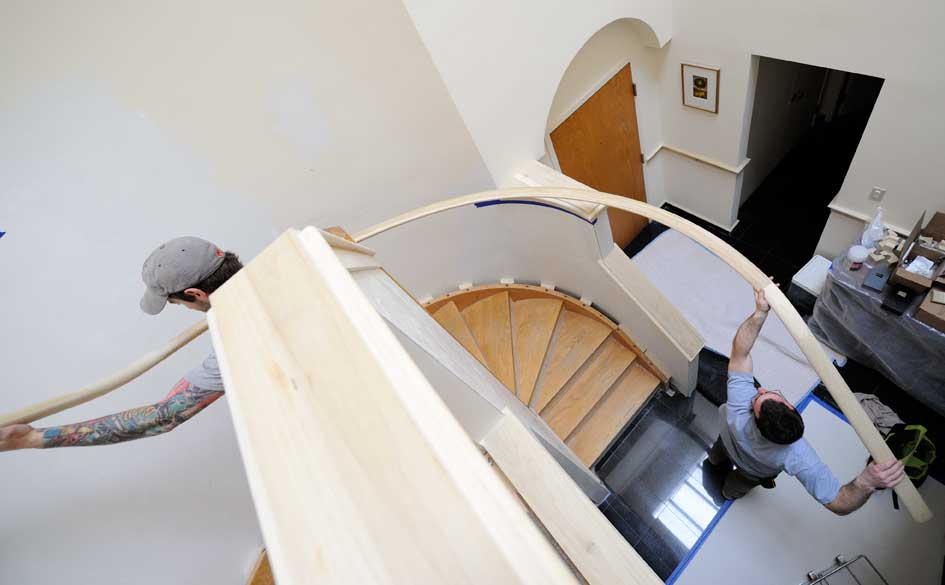
Clamping the railing in place on temporary blocks:
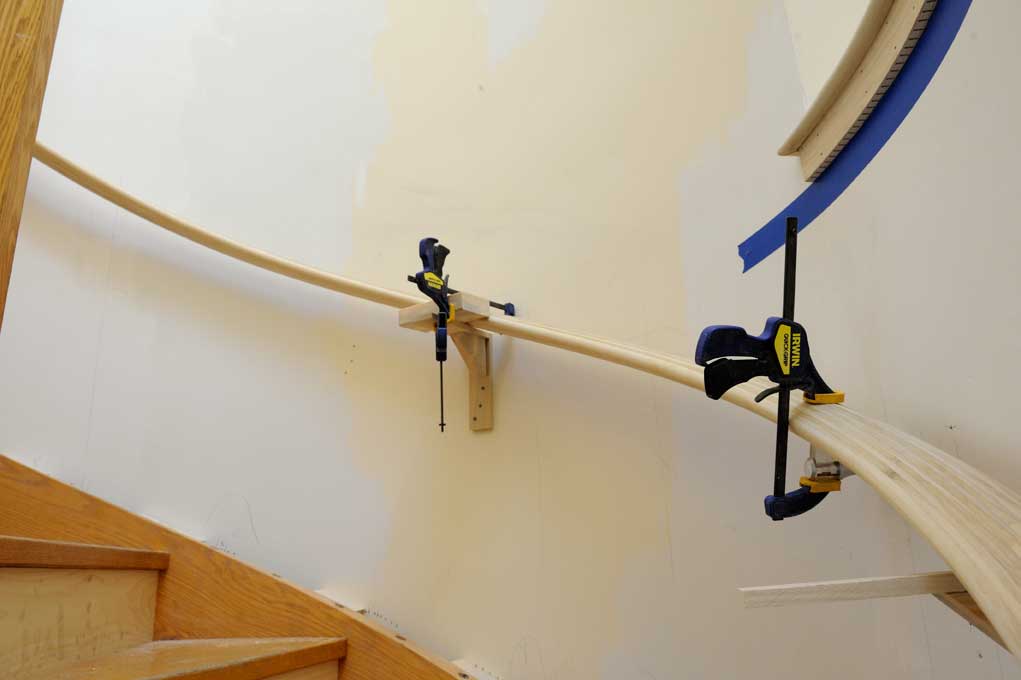
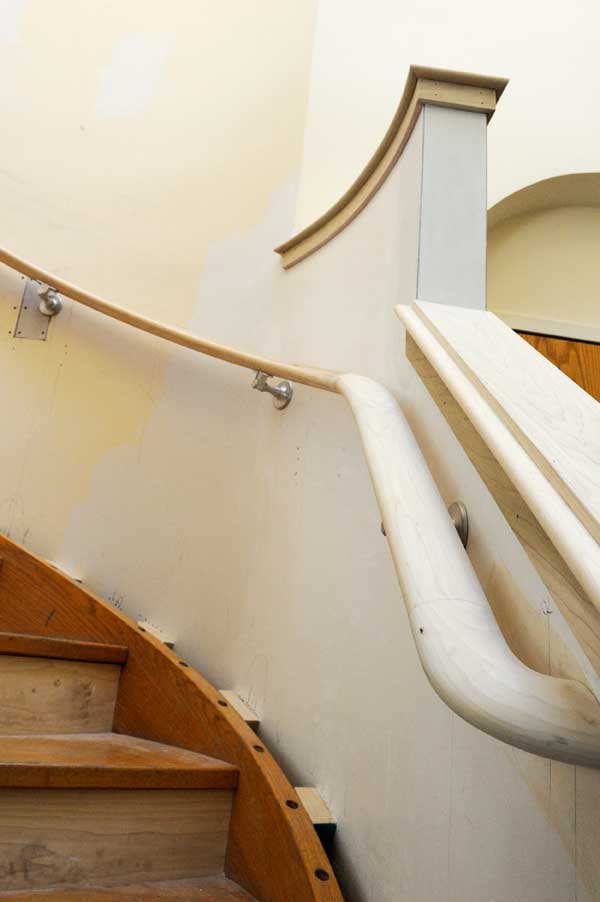
And the final installation, awaiting paint:
Tagged: curved work, epoxy, handrail, Jamaica Plain, lamination, Stair
Hey, You guys rocked it. Great job. Thanks for putting up on the web to see.
Incredible work! That’s the largest jig I’ve ever seen.