Affordable architectural detail.
Posted on 27 August 2012
Categories: Seen
Tagged: Jamaica Plain, newel post, scrollwork, spray paint

Tagged: Jamaica Plain, newel post, scrollwork, spray paint
Several years ago I taught a workshop at the Boston Building Materials Coop (now Boston Building Resources) on residential exterior trim work. I don’t remember all the details of what I said, but I emphasized the importance of using materials that would survive exposure to New England weather without rotting. The villain of my story was the fast-grown #2 pine that is available cheaply (and temptingly) at many lumber yards along with the uninformed or unscrupulous carpenters who install it. I claimed that it rarely lasted more than 10 years without succumbing to fungi and other critters.
It turned out that I was ruining the day of one of the workshop participants. Hundreds of feet of the pine in question had been installed on his house 2 or 3 years earlier, and my prediction made him a bit uncomfortable. He took my card, hoping not to call me.
Tom dug my card out this spring, 4 years after the workshop, and asked if I could take a look at his house. Some of the casing looked like it might have a problem:
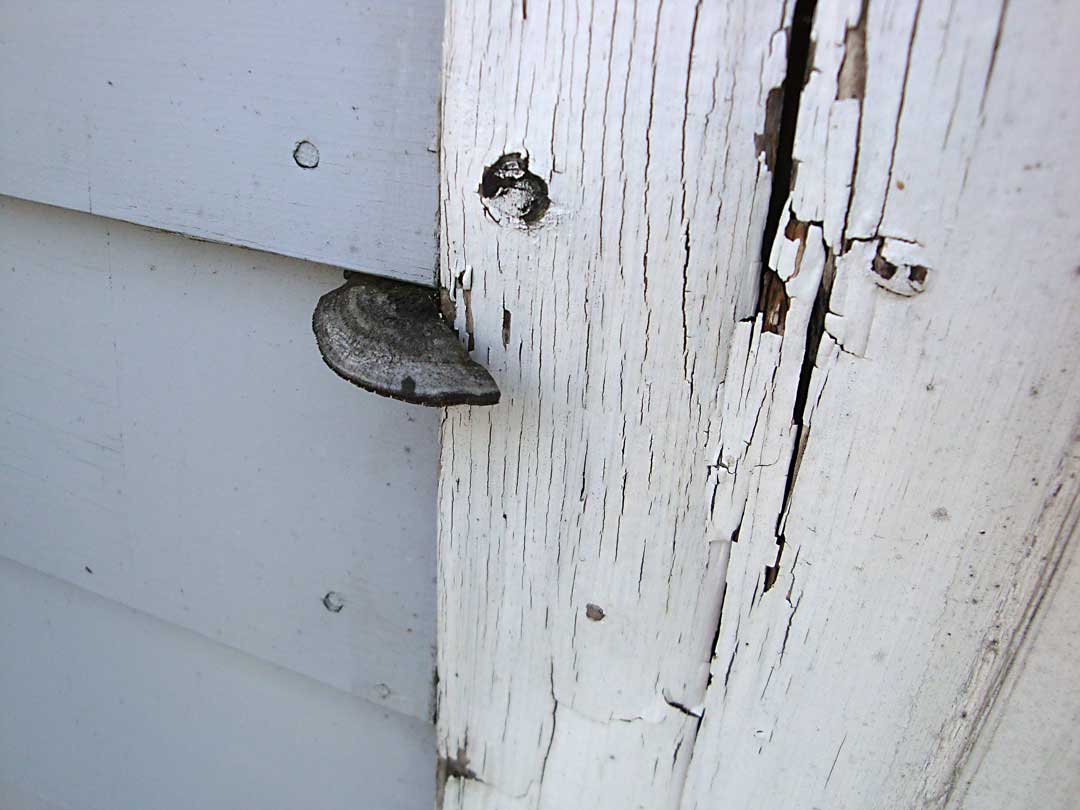
When I saw the decaying cornerboards, I apologized to Tom profusely. It’s much more gratifying to pick winning lottery numbers…
The problem with the commonly available pine in today’s lumber yards and home centers is two-fold: reality and expectations. The majority of the houses in New England that were built in the 18th and 19th centuries sported Eastern white pine trim, and today, many of those trim boards are weathered but still sound. This leads many carpenters to the not-unreasonable belief that EW pine is the right species for the job. Furthermore, all of that old trim is painted on the outer face, but the backs and ends of the boards are raw wood.
The trouble arises because the pine available today, while technically the same species, is a very different creature. The original pine trim was cut from old-growth pine logs sawn from trees that had grown slowly over hundreds of years. Under those conditions, the trees synthesized their own fungicides and pesticides, allowing them to survive for centuries in a forest full of hungry tree-eaters. Today’s plantation-grown pine trees grow so fast, under such ideal conditions, that they never need to produce the protective chemicals –called extractives– that made old-growth white pine so magical.
Compounding the problem, some contemporary carpenters take their painting cues from the craftsmen of yore. Current best practices require that all exterior wood, both trim and siding, be sealed with primer on all sides. This goes a long way toward preventing the absorption of water, and dry wood is usually unappealing to bugs and mushrooms. “But they never primed the back of the boards in the old days!” complains the tailgate historian. If we were using the same materials (and felt confident in an infinite supply), we could play by the same rules, but today’s stock and sensibilities both beg for a greater prudence.
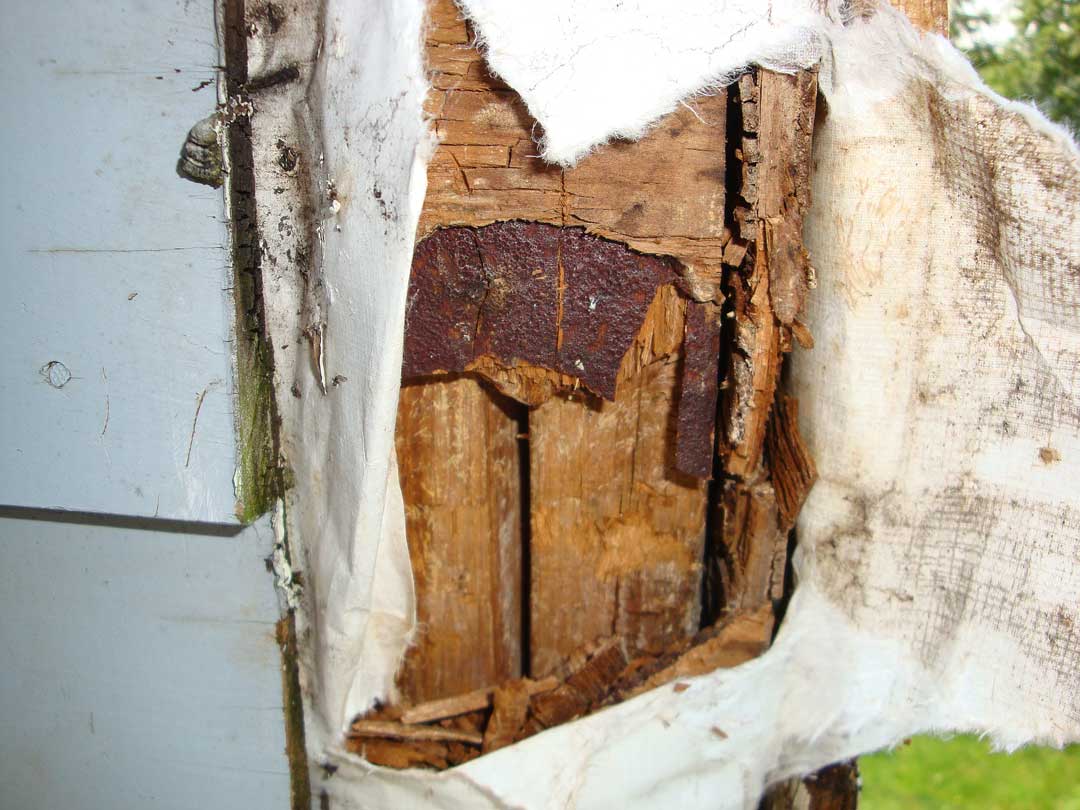
So back to Tom’s troubled house. The majority of the pine trim that had been installed in the most recent round of renovations was rotting, some of it floridly so. As we removed it, we could see that it had been back-primed (I think it came that way), but the ends were left bare, as were any cut edges. And a bit of digging showed that the problem was not just skin-deep:
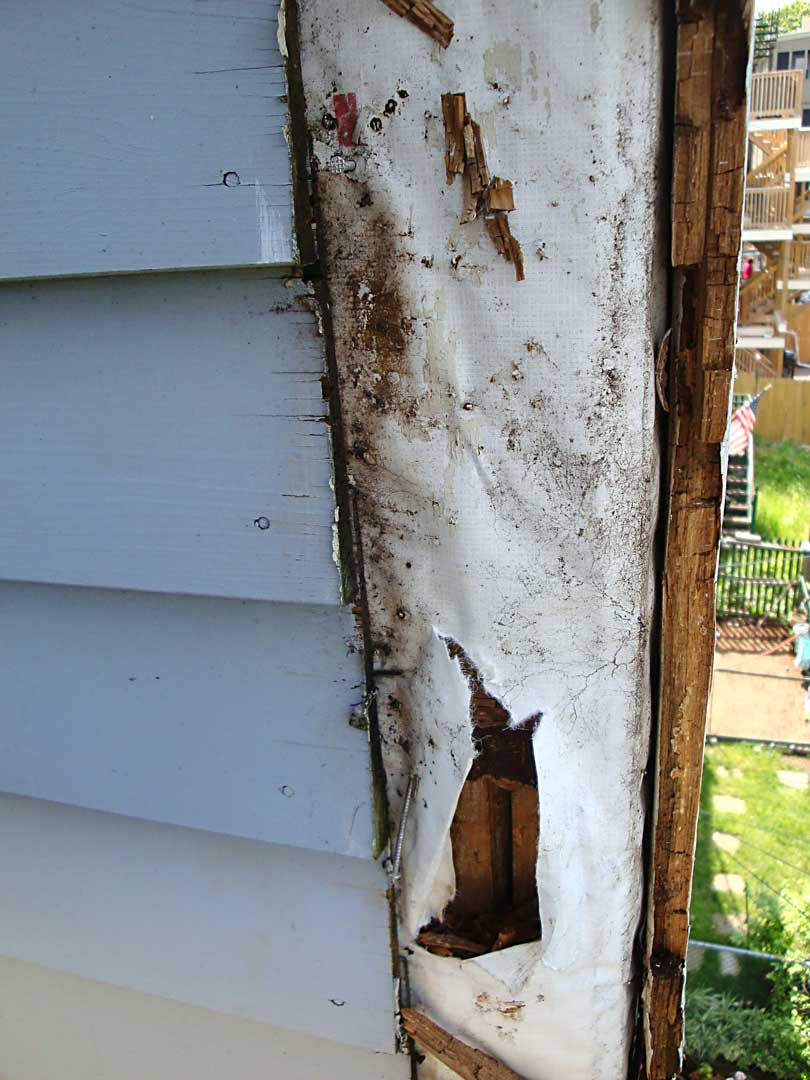
The edges of the clapboards (western red cedar and usually fairly rot-resistant) were unpainted. Like the pine cornerboards, they seemed like they were chronically wet and had started to develop fungal decay. And perhaps most troubling, we found that the building barrier wrap, Tyvek in this case, had failed, allowing a great deal of moisture into the sidewall. The Tyvek seemed to be intact when we removed the cornerboard (we made the tear shown in the photo above).
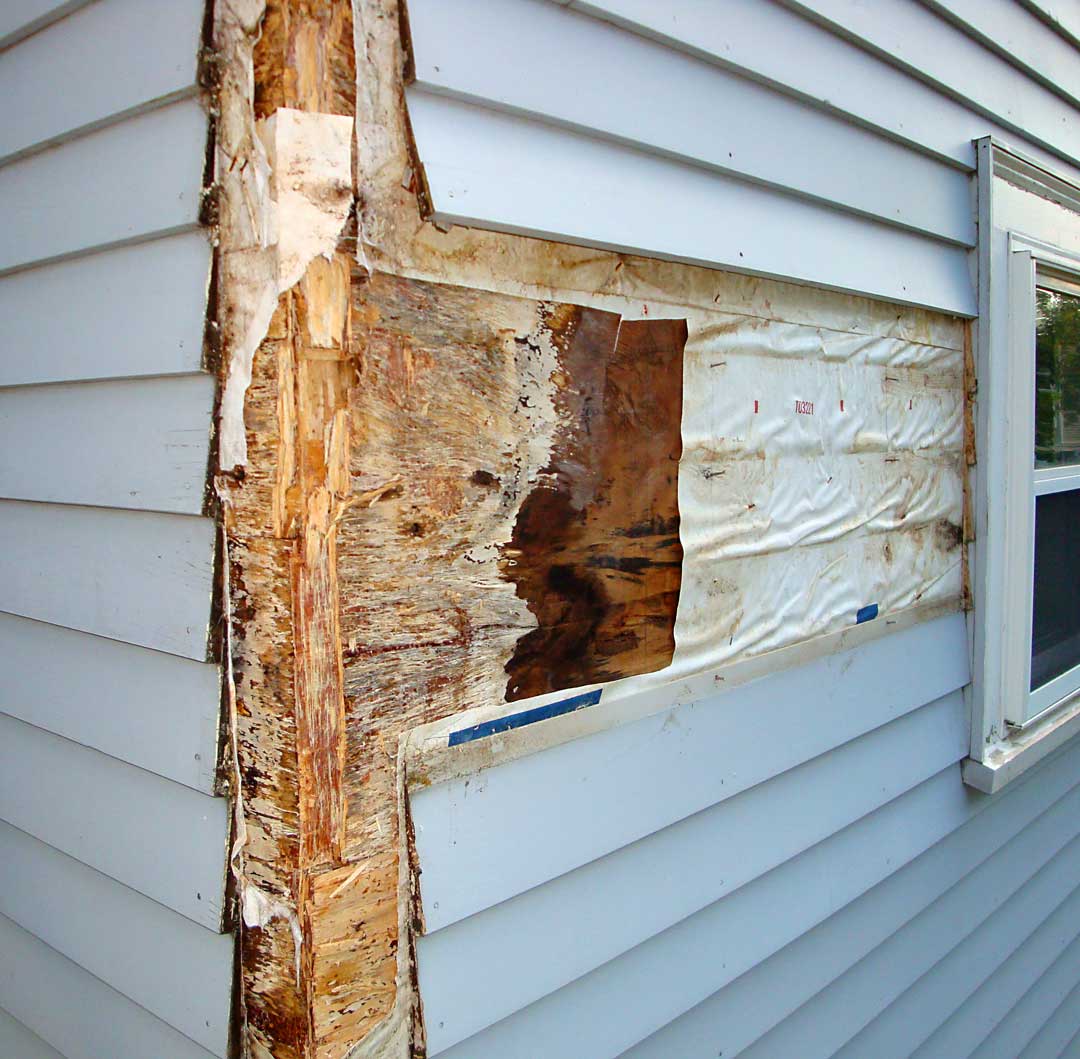
The plywood sheathing had almost completely disintegrated 16″ out from either side of the corner, and even the framing beneath was starting to rot:
Tyvek is a material that makes me nervous, because its successful use is predicated on perfect construction practices. The problems with plastic building wraps like Tyvek are inextricably linked to their benefits. They are engineered to be impermeable to liquid water and to allow the slow passage of water vapor. In an ideal world, this makes lots of sense, as the building wrap will repel any liquid water that gets behind the siding but allow water vapor from inside the house to escape. However, if the plastic building wrap is breached (or installed with the wrong overlap orientation), liquid water that gets behind it can become trapped. (1) This is what we believe led to the sheathing rot at Tom’s house.
Now we had to put Tom’s mistreated house back together. We made a small number of changes in materials choice and building practice that should lead to a very different outcome:
While we are delighted to have many repeat clients, we strive to ensure that our subsequent projects don’t involve work we’ve already completed.
(1) Housewraps, Felt Paper, and Weather Penetration Barriers, published online by the University of Massachusetts Building and Construction Technology program.
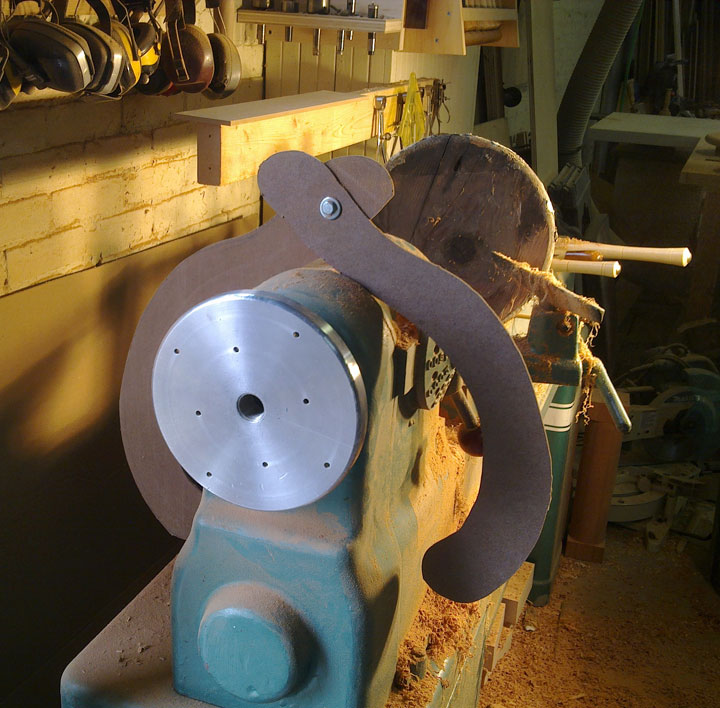
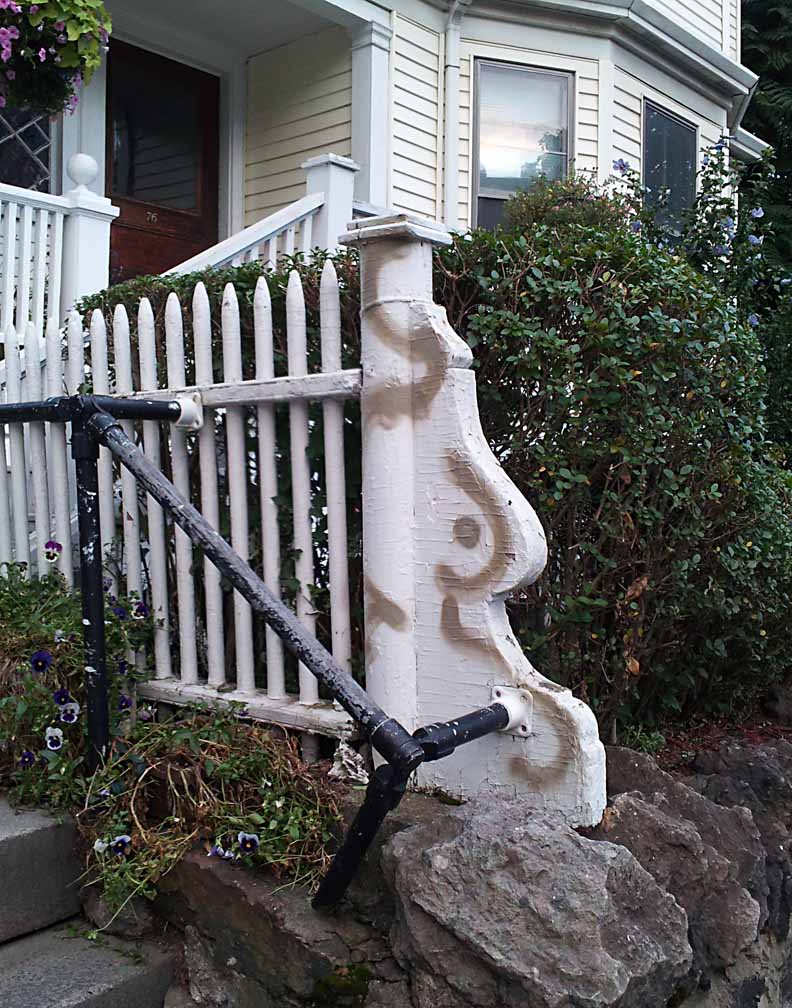
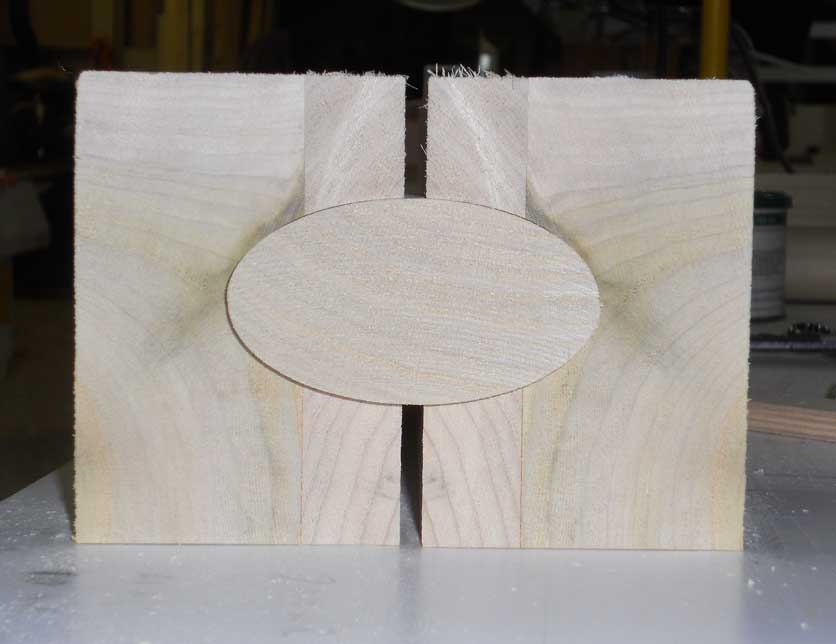
Outside calipers, finely crafted from old-growth masonite.
No one seems to make really big calipers any more. We had to turn a couple of column bases for a porch in Newton, MA recently. The porch roof was up on jacks, though, so we didn’t want to peruse flea markets and tool auctions. Evan got the job done anyhow.
Tagged: lathe, masonite, turning. calipers
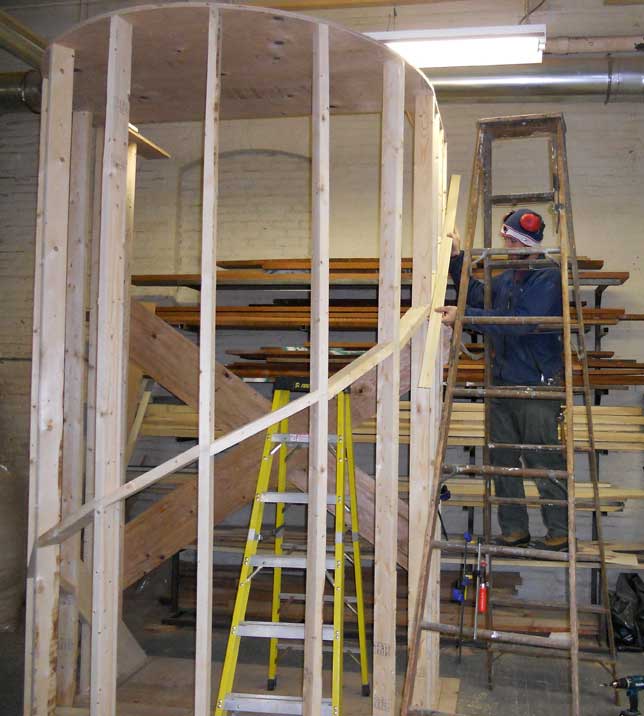
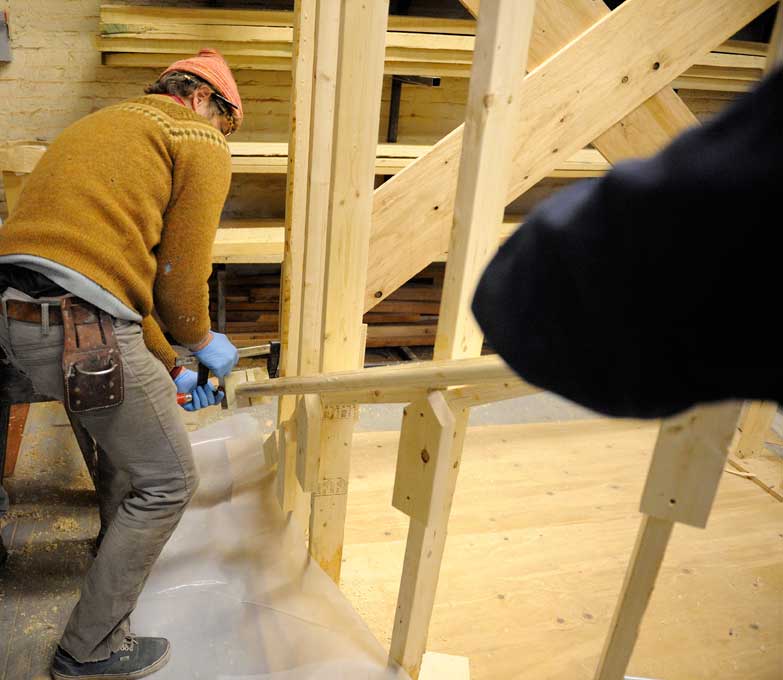
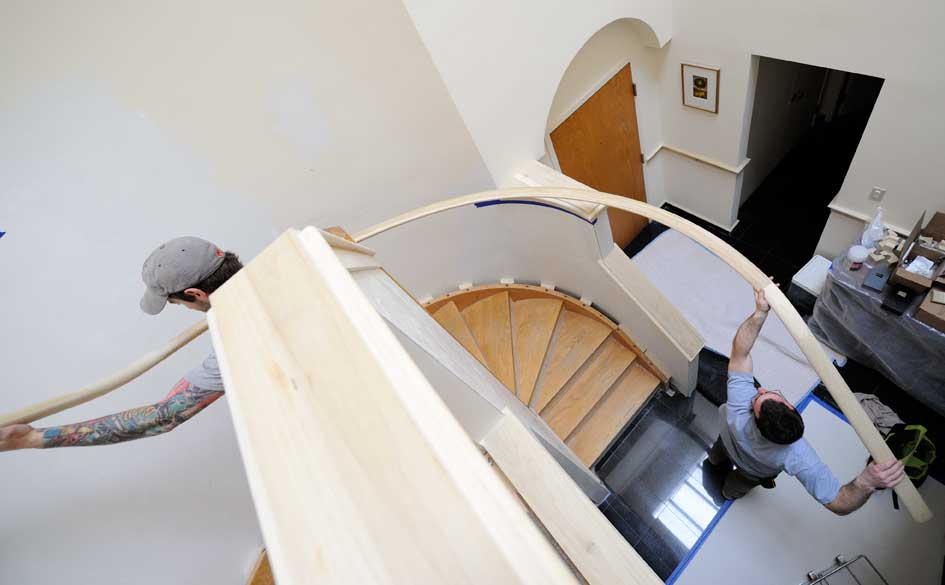
Mary Horst, of Horst Buchanan Architects, Inc., approached me in November of 2010 about reworking a stair in an early ’80s condominium in Jamaica Plain, MA. The original stair was open, giving the new homeowners visions of late-night tumbles, and the design had not aged well.
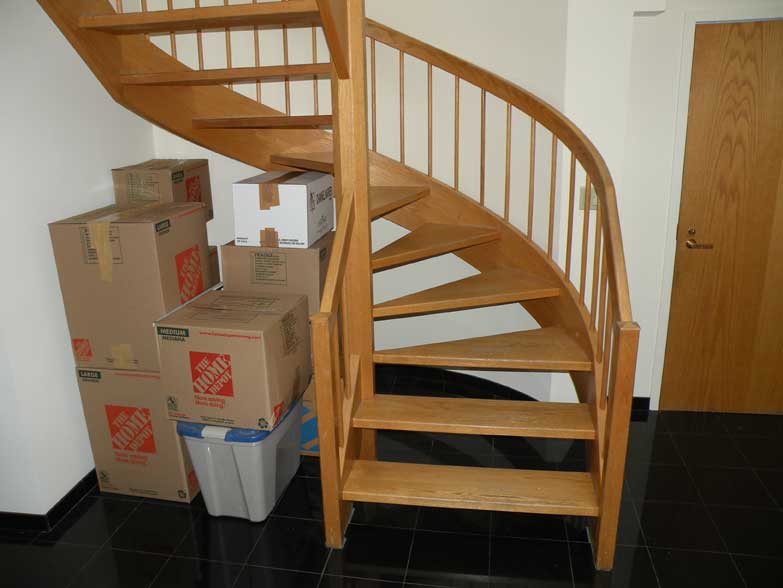
Budget and logistics required that the framework of the stair remain, but Mary wanted to add risers and half walls, and eliminate the oak balustrade. The biggest challenge of the job would be fabricating a new wall-mounted handrail.
Mary’s new design required a continuous, smoothly curving handrail with no visible joints. Because the stair transitioned from straight rise to curving rise and back again, the handrail would have to change pitch in addition to following the curve of the wall. We planned to make a bent lamination for the main curve, but the transitions would have to be individually carved.
Part 1 – Preparation
We started the project by carefully templating the existing stair in plan and elevation, so that we could replicate the shape in our shop.
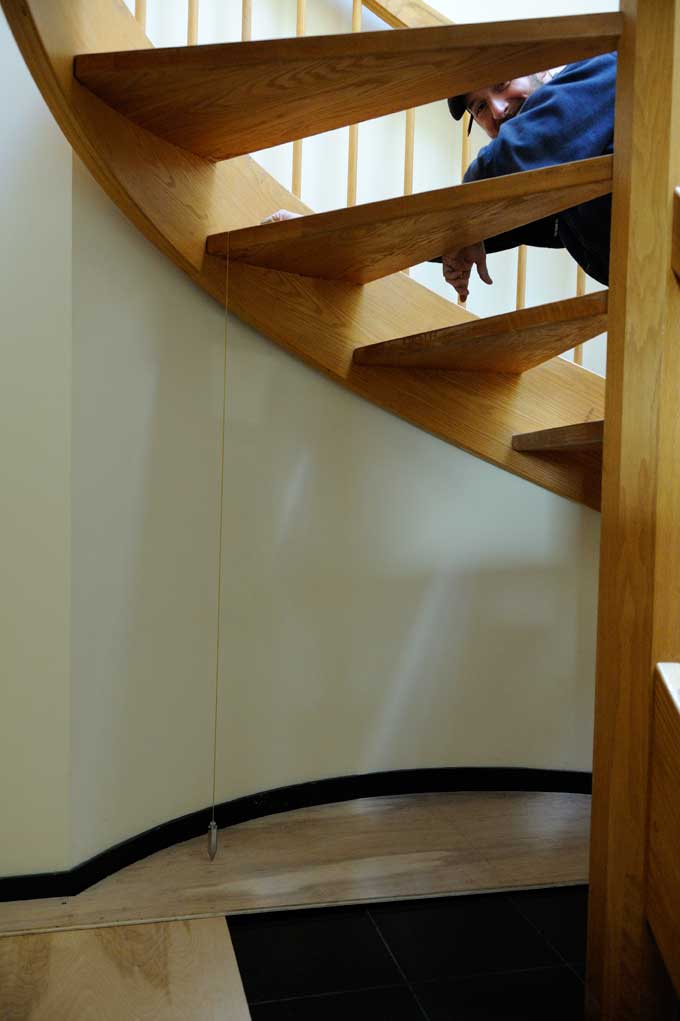
Tim and his plumb bob!
We mapped the shape of the outside stringer onto the luaun template and transferred the location in plan of all the treads. The we we made a story pole to give us the tread locations in elevation. From this information, we were able to build a bending form in the shop that mimicked the original stair.
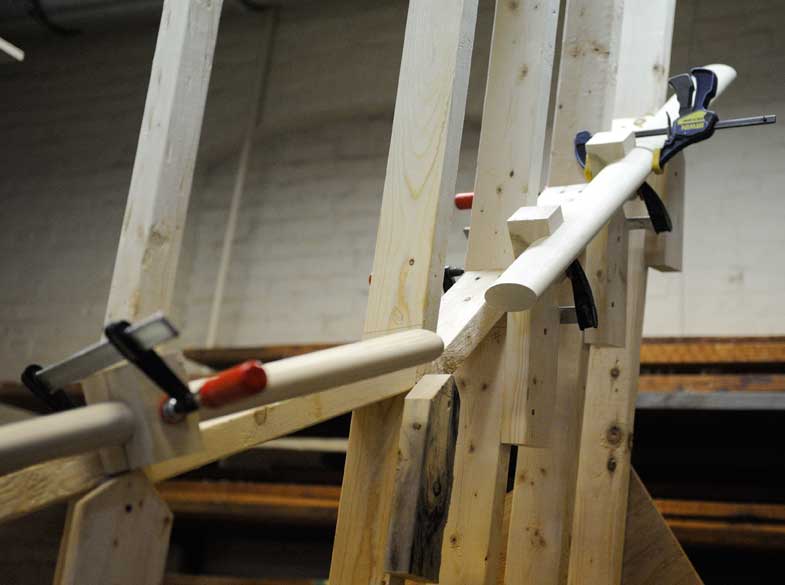
Our plan for the main curved railing was to mill straight sections of the handrail, cut them into strips, and then reassemble then on the form. In addition to the handrail itself, we would need blocks with opposite shape to clamp the bent lamination.
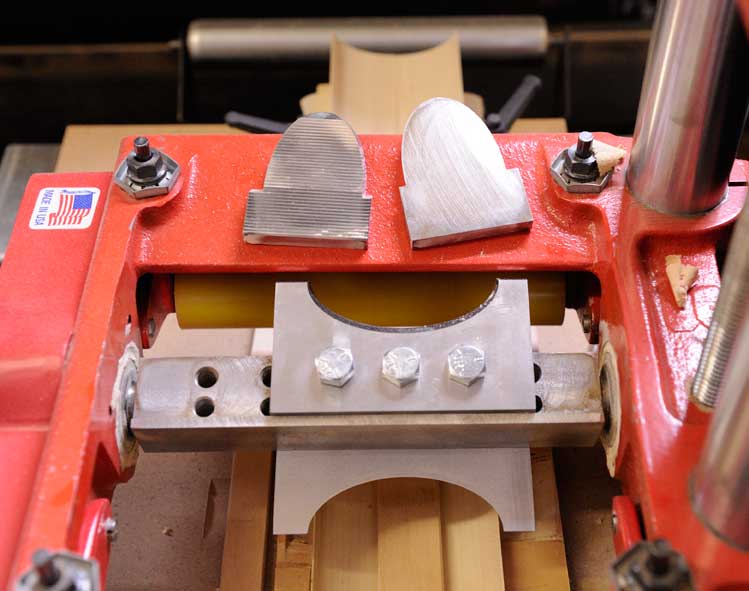
The Williams & Hussey molder with the handrail knives, and the shaper knives above for the clamping profile.
On to making sawdust!
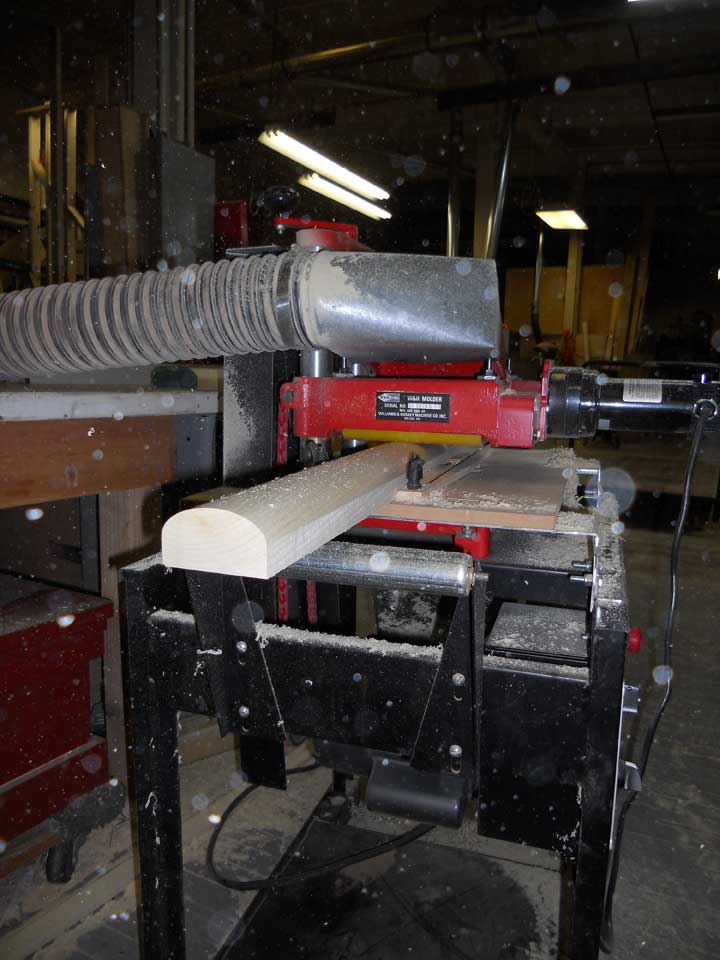
Milling the first side.
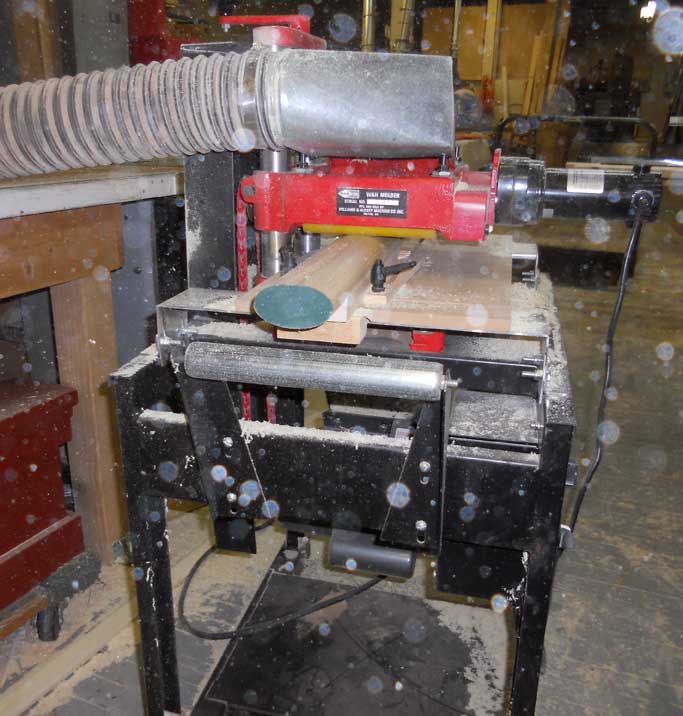
And the second side, with the clamping profile underneath as a cradle.
The completed profiles.
In order to make the curved handrail, we had to cut the handrail into strips thin enough to bend around the form. The problem is that some of the profile is lost to sawdust (the dreaded saw kerf!) each time we rip a strip from the solid handrail. In order to finish with a complete profile, we started with two handrail blanks, cutting alternate strips from each blank. Once cut, he strips got numbered and laid out in sequence, ready for glue.
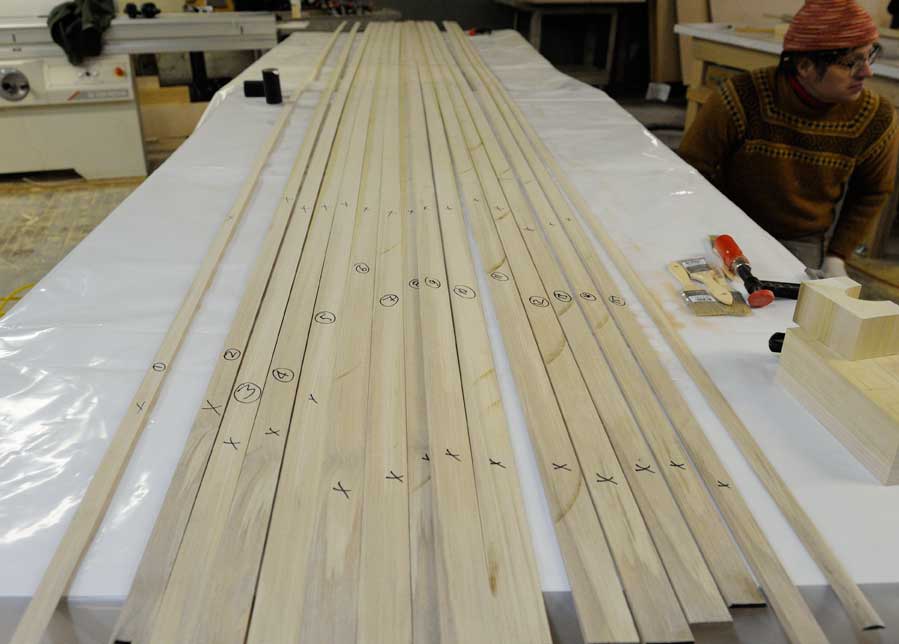
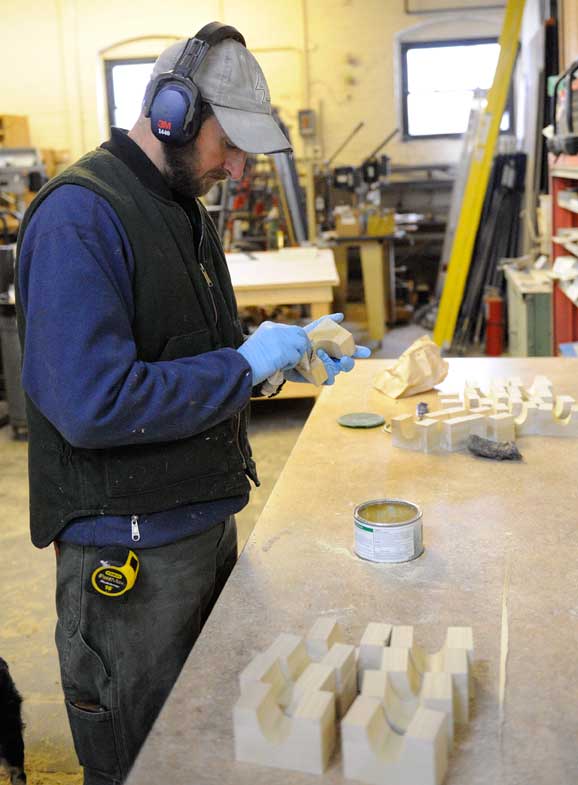
The last step before the glue-up was to cut and wax the clamping blocks.
Part 2 – The glue-up
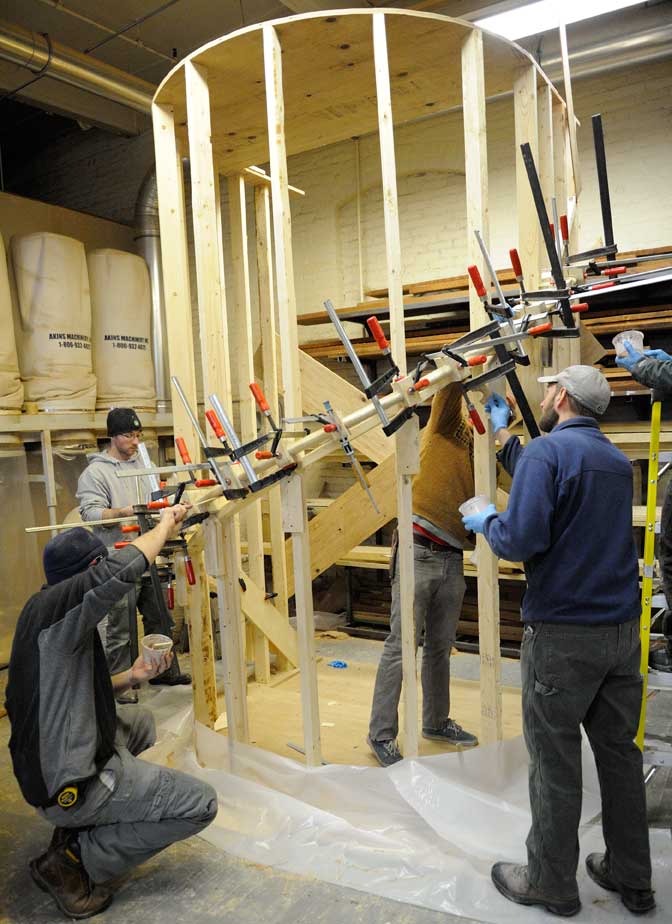
Anyone who imagines woodworking as an idyllic pastime has not been present for a large-scale glue-up. In this case, we had 16 poplar strips, all 16 feet long, which had to get glued, assembled into the right shape, and then bent around an alarmingly small radius, all while maintaining the precise pitch needed to match the existing stair. It’s the woodworkers’ ballet, requiring precise timing, movements, and coordination. Concentration is everything, so we never glue up in the hour before lunch, and never in the last few hours on a Friday. And supervision is critical:

All hands on deck, we started applying marine epoxy (West System) to the strips.
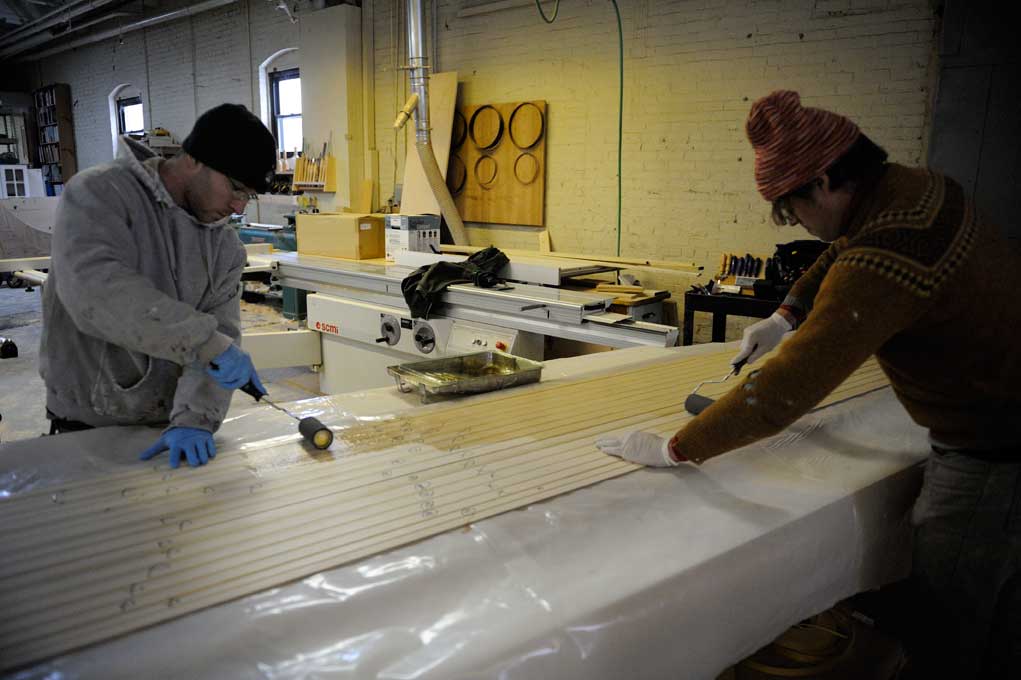
First unthickened epoxy.
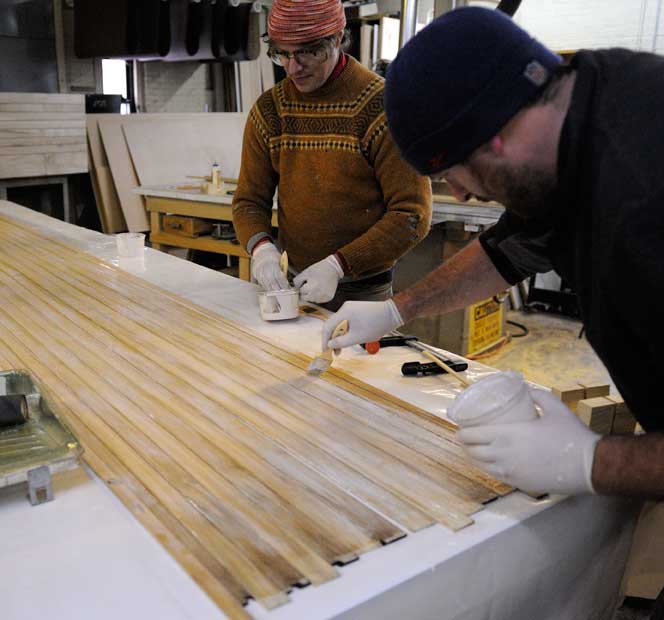
And then epoxy with a gap-filler.
We assembled the pieces on the bench:
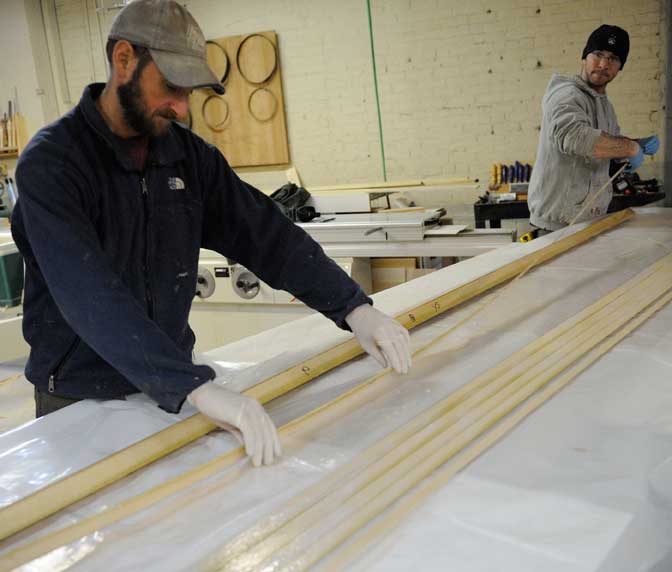
Clamped it at the lower end:
And carried it to the form:
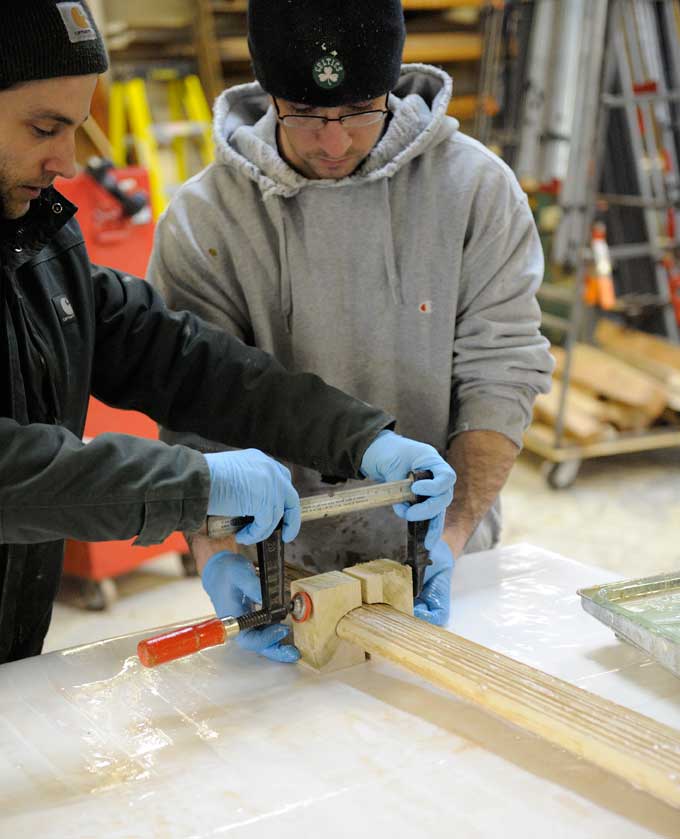
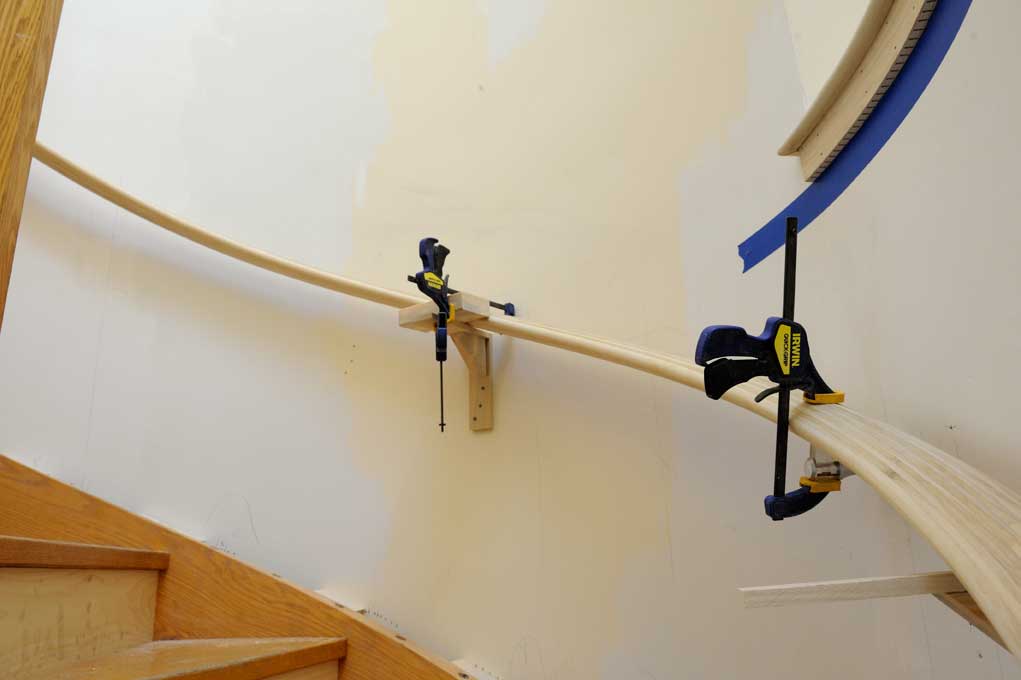
As we started to clamp the handrail strips on the form, we had to maintain a consistent spacing off the form, align with our reference guides (representing the nosing of each tread), and keep the profile level as it rose.
Aligning,
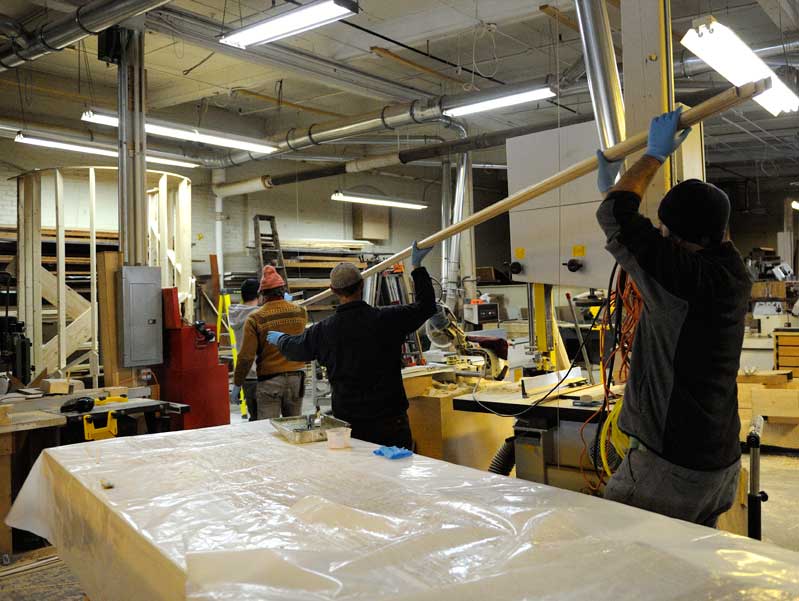
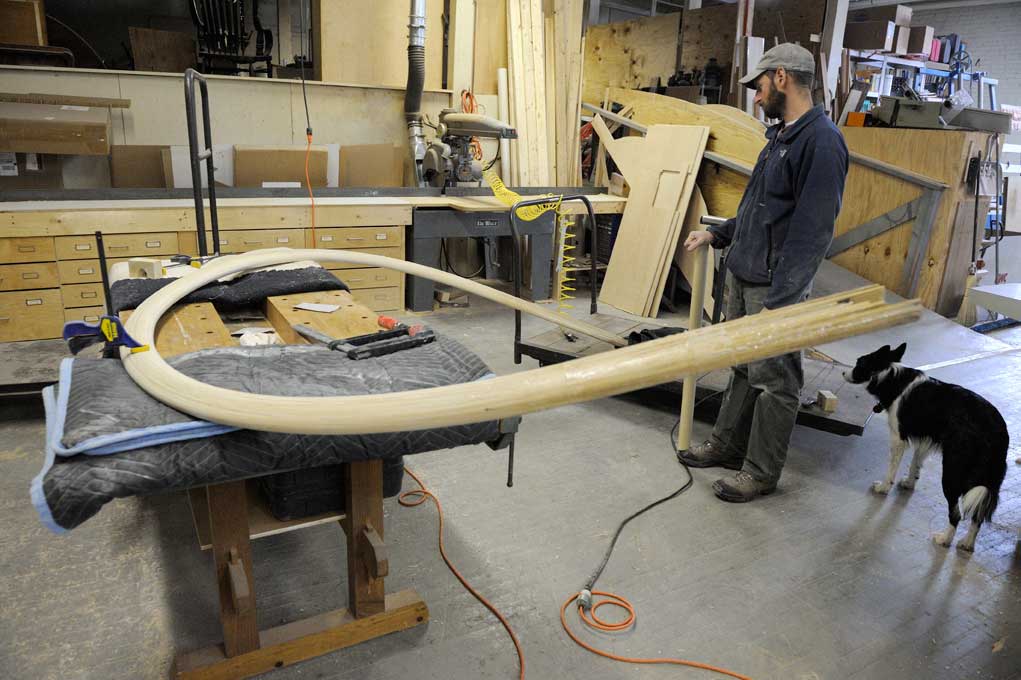
the final bend,
and cleanup:
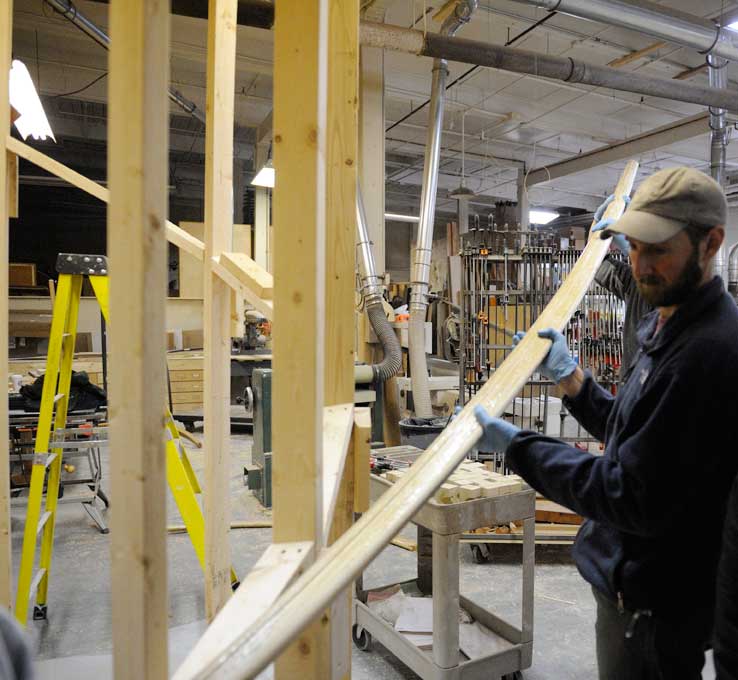
We let the epoxy cure for a couple days on the form, and then took down the rail remove excess epoxy and sand it smooth.
As with all woodworking tasks, a contemplative frame of mind is crucial to success.
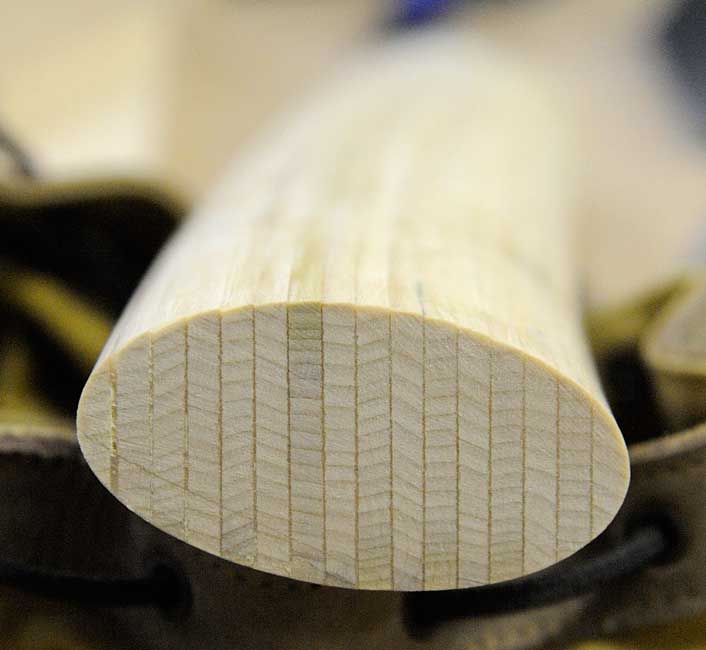
A look at the laminations:
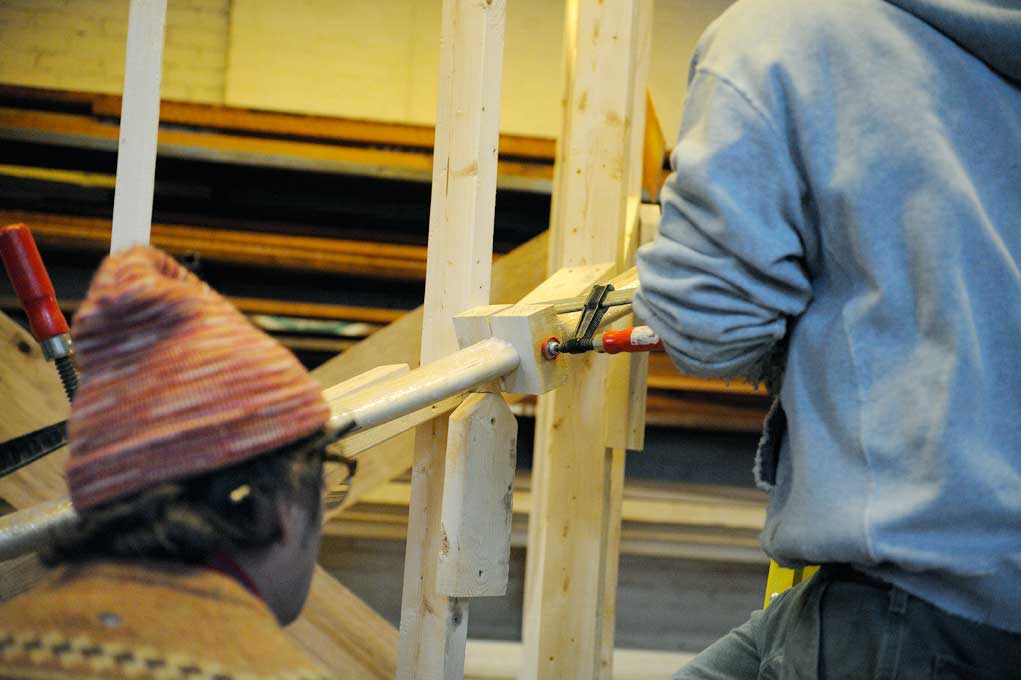
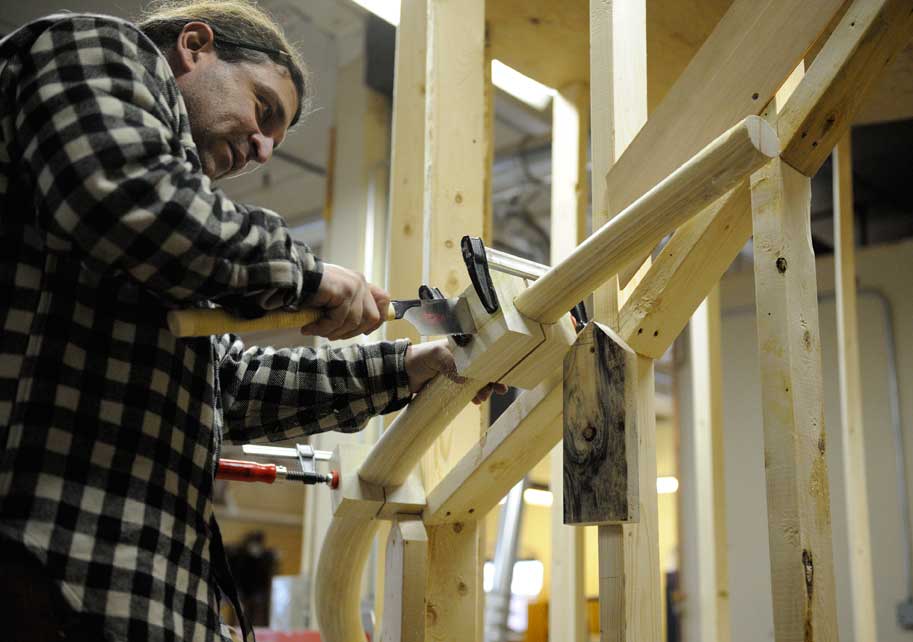
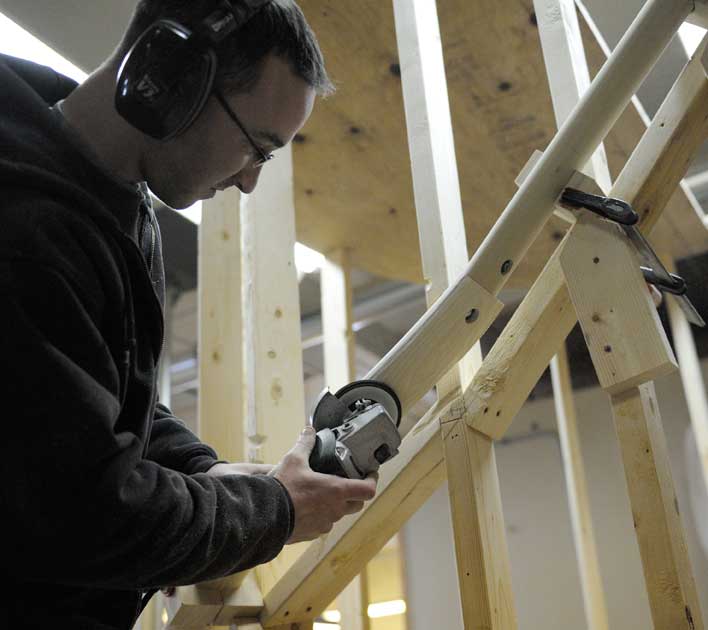
Part 3 – Transitions
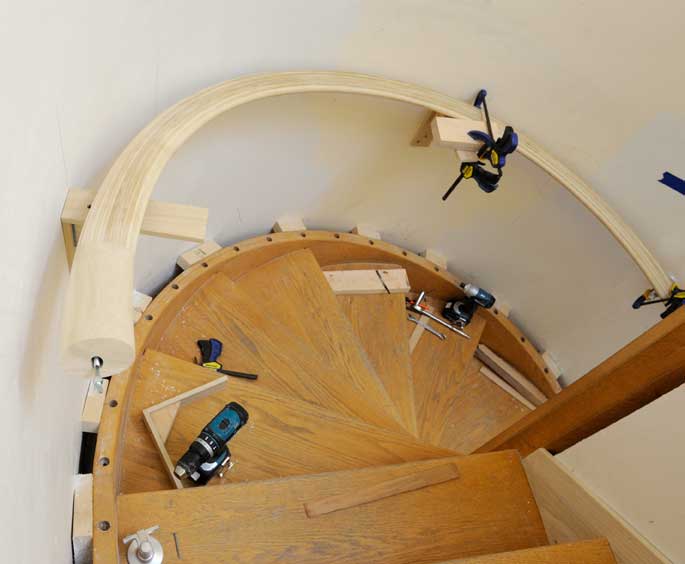
Once the main part of the rail was cleaned up, we clamped it again to the form so we could determine the locations for the transitions in slope. A deep breath, and we cut tangent to the curve.
(Let the above photo serve as evidence that I am still occasionally allowed to handle tools myself.)
We clamped the straight railing section in place:
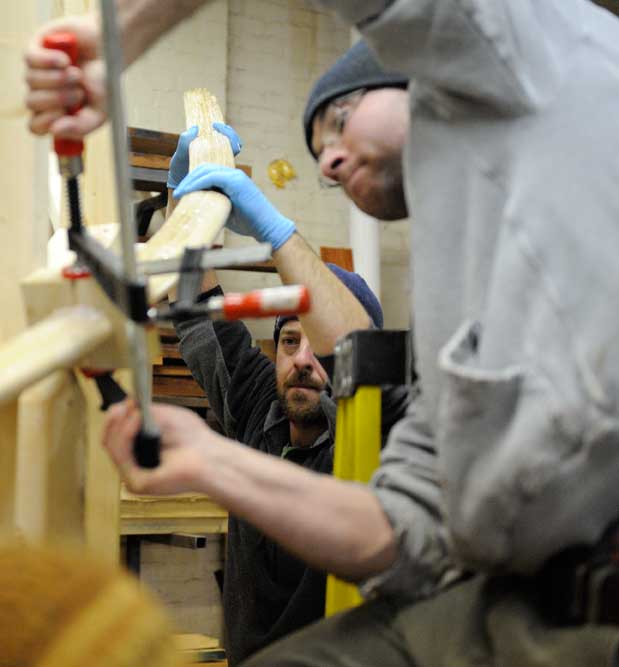
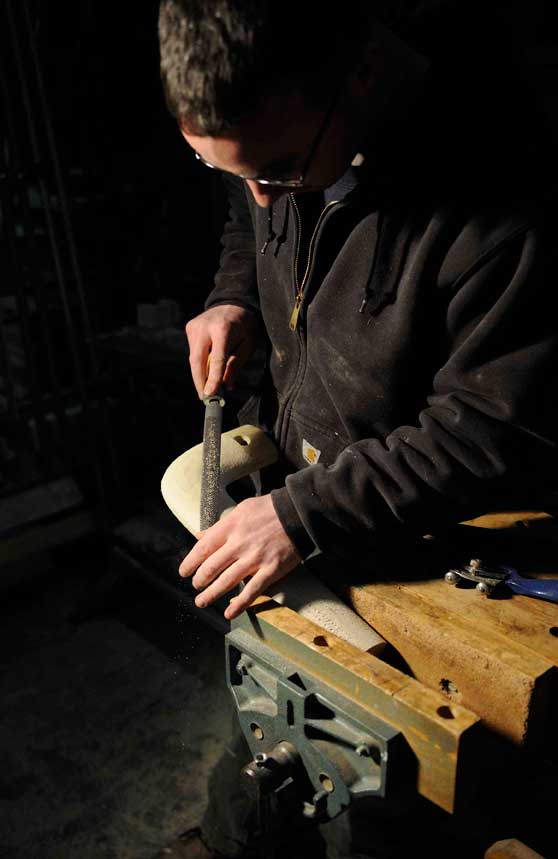
And carved the transition piece:
We also had to carve 90-degree returns for either end of the handrail.

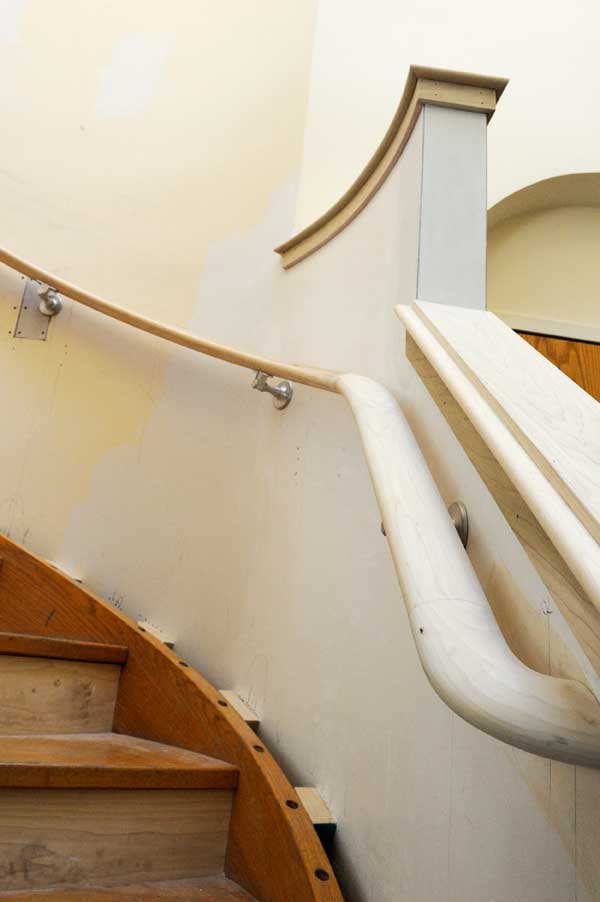
Part 4 – Installation
As we drove to the job site with all the handrail parts, a little anxiety crept in — had Tim really gotten all those measurements right?
Apparently yes.
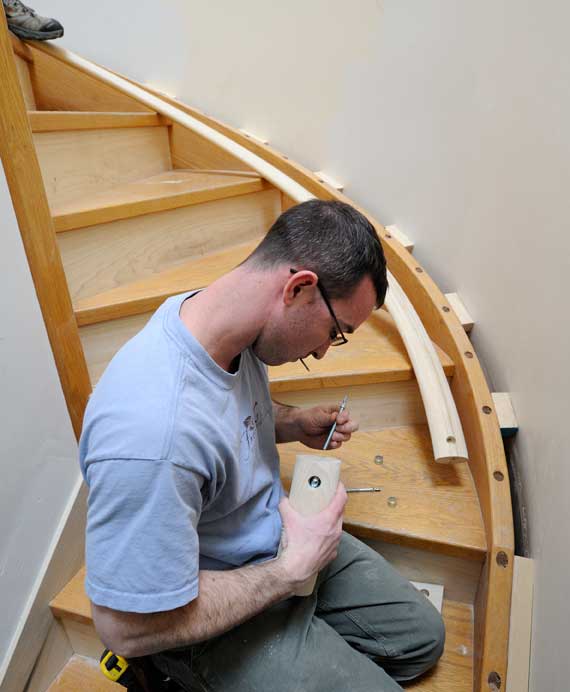
Assembling one of the transitional pieces with concealed handrail bolts.
Then flipping the rail right side up:

Clamping the railing in place on temporary blocks:
And the final installation, awaiting paint:
Tagged: curved work, epoxy, handrail, Jamaica Plain, lamination, Stair
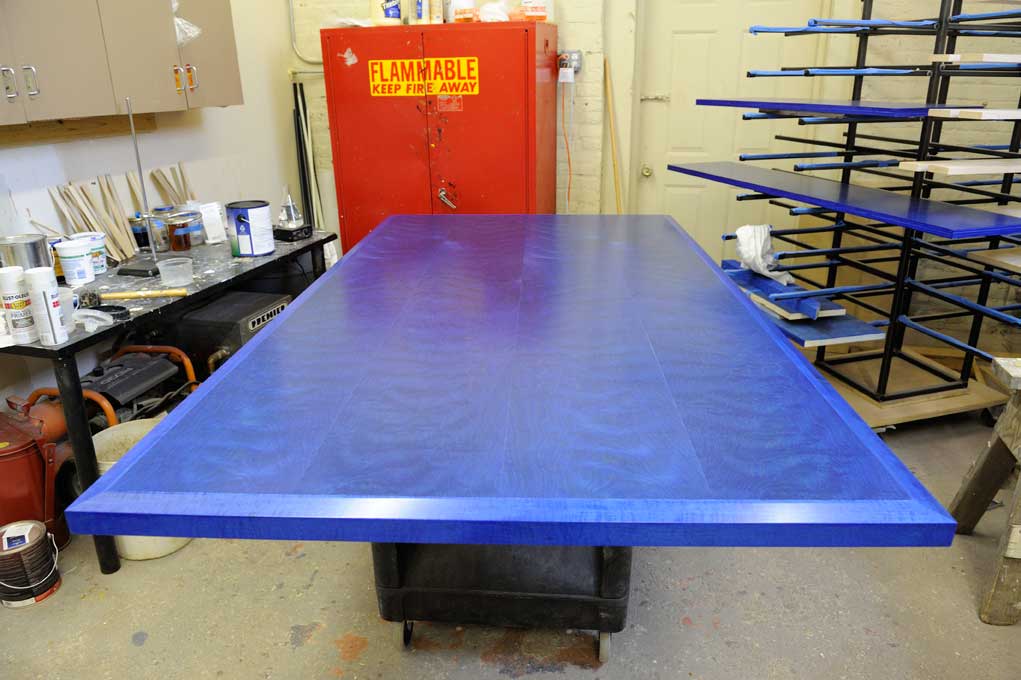
We’ve gotten a chance to do some fun work lately — curved handrail, walnut tables in the style of Nakashima — but it seems that the formula for getting good press is staining some plywood bright blue.
My friend David Doyle, longtime owner of the bookstore Rhythm and Muse, called me recently about making a table and drink rails for his new tapas restaurant cum vinyl haven Tres Gatos (a reference to beloved family members, not menu items…). The goal was to make a big impact on a light budget, and Dave fell in love with an intense blue stain from Trans Tint.
The stain, plus shellac and a UV-blocking top coat from Target Coatings gave us what we were hoping for:
The funny part came a few days later when I got a call from a reporter with the Jamaica Plain Gazette. She told me that I was a local “artisan” who had been “commissioned” to build a “great table” and wanted to interview me about the experience. It took me a moment believe that I wasn’t being put on, but then I rolled with it, with the following results:
“My wife Mari and I began thinking about adding a tapas restaurant almost five years ago, partly because we love Spanish tapas and wine and because we believe there is strong demand for such a place in the neighborhood,” Doyle said.
A centerpiece of the dining room will be a large communal table that has been commissioned from local artisan Milton Trimitsis. The eight-seat table will seat large parties or groups of smaller parties.
“It’s a chance for people to get to know each other that would normally not sit together,” Doyle said. “Plus, it’s really great to have work done by a local guy.”
“It’s very exciting to have a small role to play in the restaurant,” Trimitsis said. “And it sounds like a fun way to have dinner.”
– Rebecca Oliveira for the JP Gazette, 7 January 2011
So if plywood-and-primary-colors is what it takes to make it in the new media landscape, we’ve got it sewn up…
I finally got a chance to have a meal at Tres Gatos last weekend, and got a photo of our press-friendly table in action.
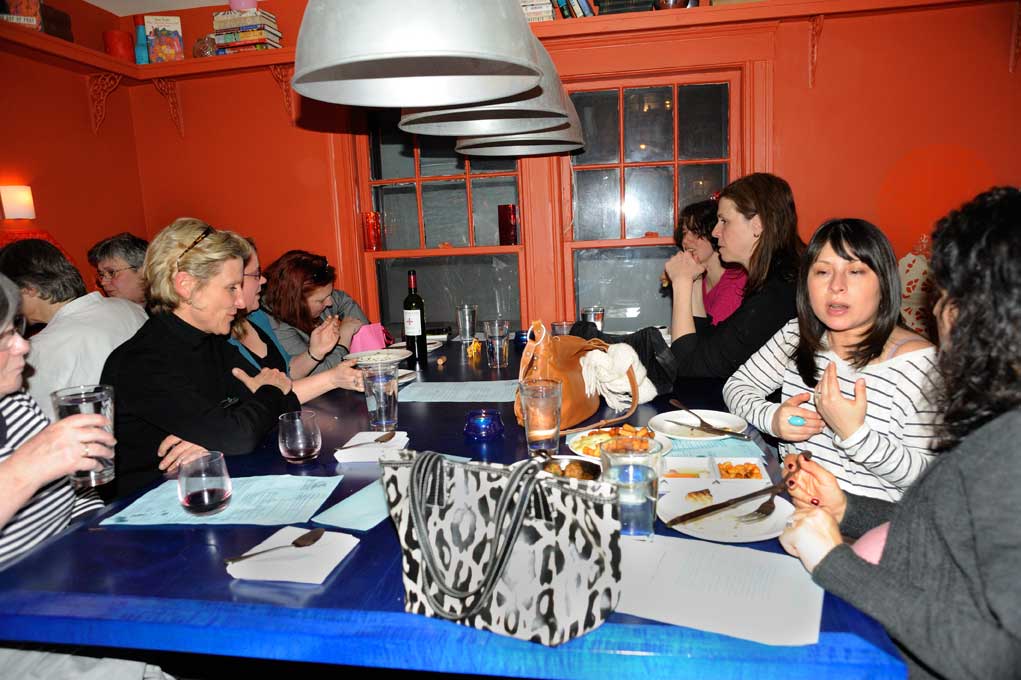
Wonderful food, by the way. Thanks, Dave.
Tagged: Blue table, David Doyle, Jamaica Plain, restaurant, Rhythm & Muse, Trans Tint, Tres Gatos
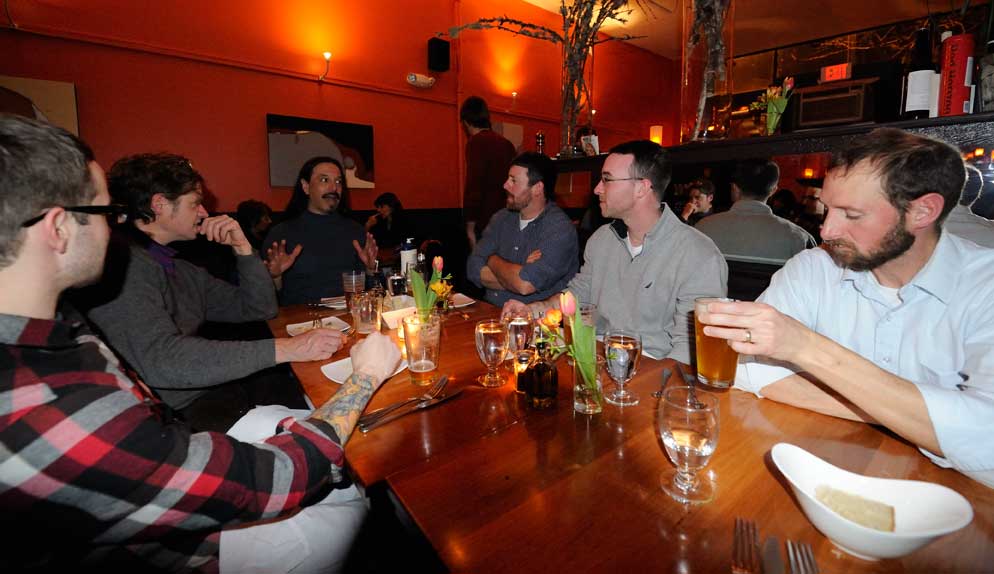
For the first time in living memory, we all managed to gather in one place, and what a place! a wonderful Jamaica Plain restaurant called Vee Vee, owned by our friends Dan and Kristen Valachovic. Unfortunately, the event that finally motivated us to gather en masse was John’s going-away dinner. Today was his last day (tiling to the end!), and Saturday he starts the drive back to San Diego, via Vermont, to honor his love of non-Euclidean geometry.
John holding forth
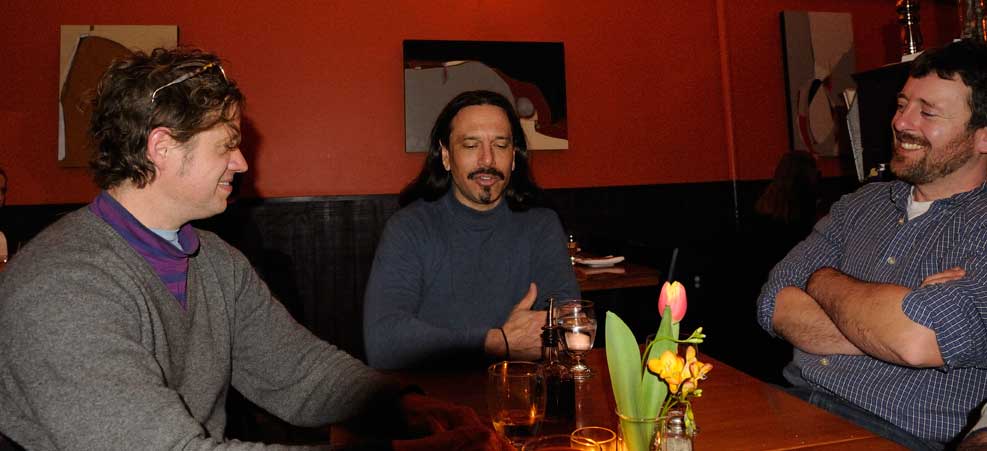
Winston, John, and Stephen
Best wishes and happy travels to John, and we hope to lure him back to the fairer coast soon.
Tagged: Vee Vee
The newspapers in New England have been filled with stories of roofs (rooves?) collapsing under their accumulated snow loads this winter; it’s become grimly routine. So I was somewhat heartened to see a less catastrophic version of the phenomenon in a photo Chris Hosford (one of my architectural collaborators) sent me today:
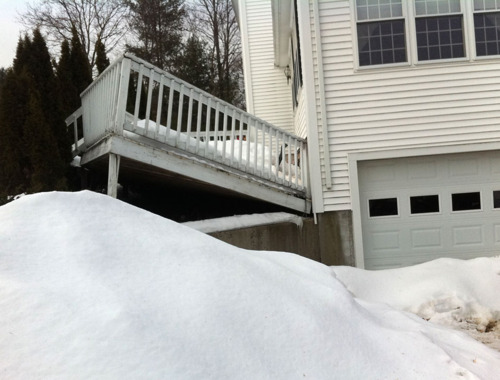
We’ve gotten used to stories of decks collapsing under the weight of large numbers of drunken party guests, so perhaps the snow did these homeowners a favor.
To the forensics, though! What happened to this little side deck? As we’ve seen before, carpentry can be (crudely) reduced to a battle between building materials and gravity. For decks, there are usually two anti-gravitational systems: the posts which rest on some kind of footings and the ledger that attaches the whole affair to the main structure. While I’ve seen all kinds of marginals post/footing arrangements, the usual failure point is the ledger, a piece of (hopefully) pressure-treated framing lumber fastened to the sidewall.
Perhaps this isn’t so surprising, since ledgers and their attachments have many obligations:
Attaching the ledger presents two challenges: use fasteners that won’t fail, and make sure that you are attaching to something solid in the main structure. In our experience, folks often blow it on both accounts. They attach the ledger with nails, which allows it to pull away, or with deck screws, which tend to shear off. Structural bolts blessed by engineers are the right way to go here. And they don’t dismantle enough of the main house to confirm that they are attaching to intact framing members.
Water presents the third big challenge. Even if everything else was done correctly, if water migrates behind the ledger, the sheathing and framing in the main structure can rot, making the first two issues moot. This is easily avoidable with careful flashing (the subject of a future article; perhaps many…), but time, effort, and knowledge are prerequisites.
So what happened to the little-deck-that-couldn’t? I haven’t visited in person, but the photo suggests that the deck fell straight down rather than pulling away and then falling. My guess is that either the fasteners failed outright under the snow load, or that the sidewall of the house had gotten punky from years of water incursion, and the rotted sheathing crumbled under the snow load.
Tagged: deck, porch, snow load, structural failure, winter
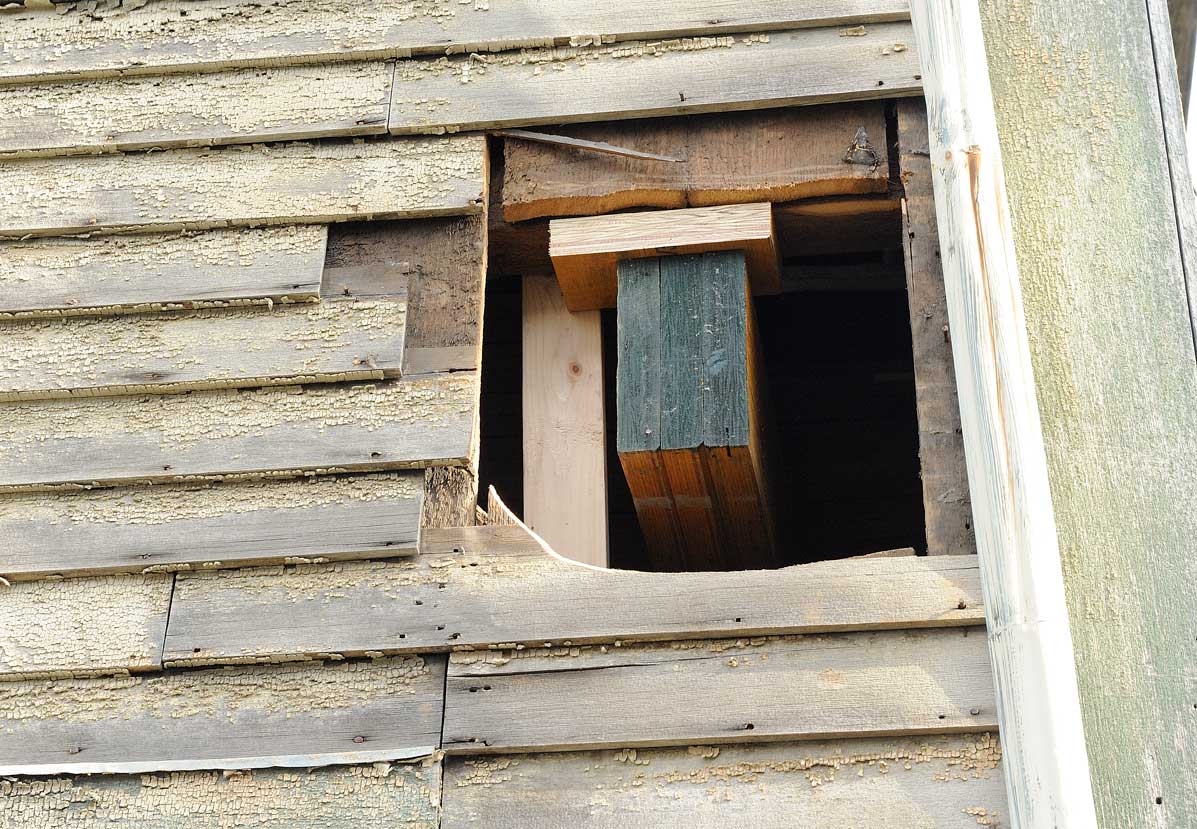
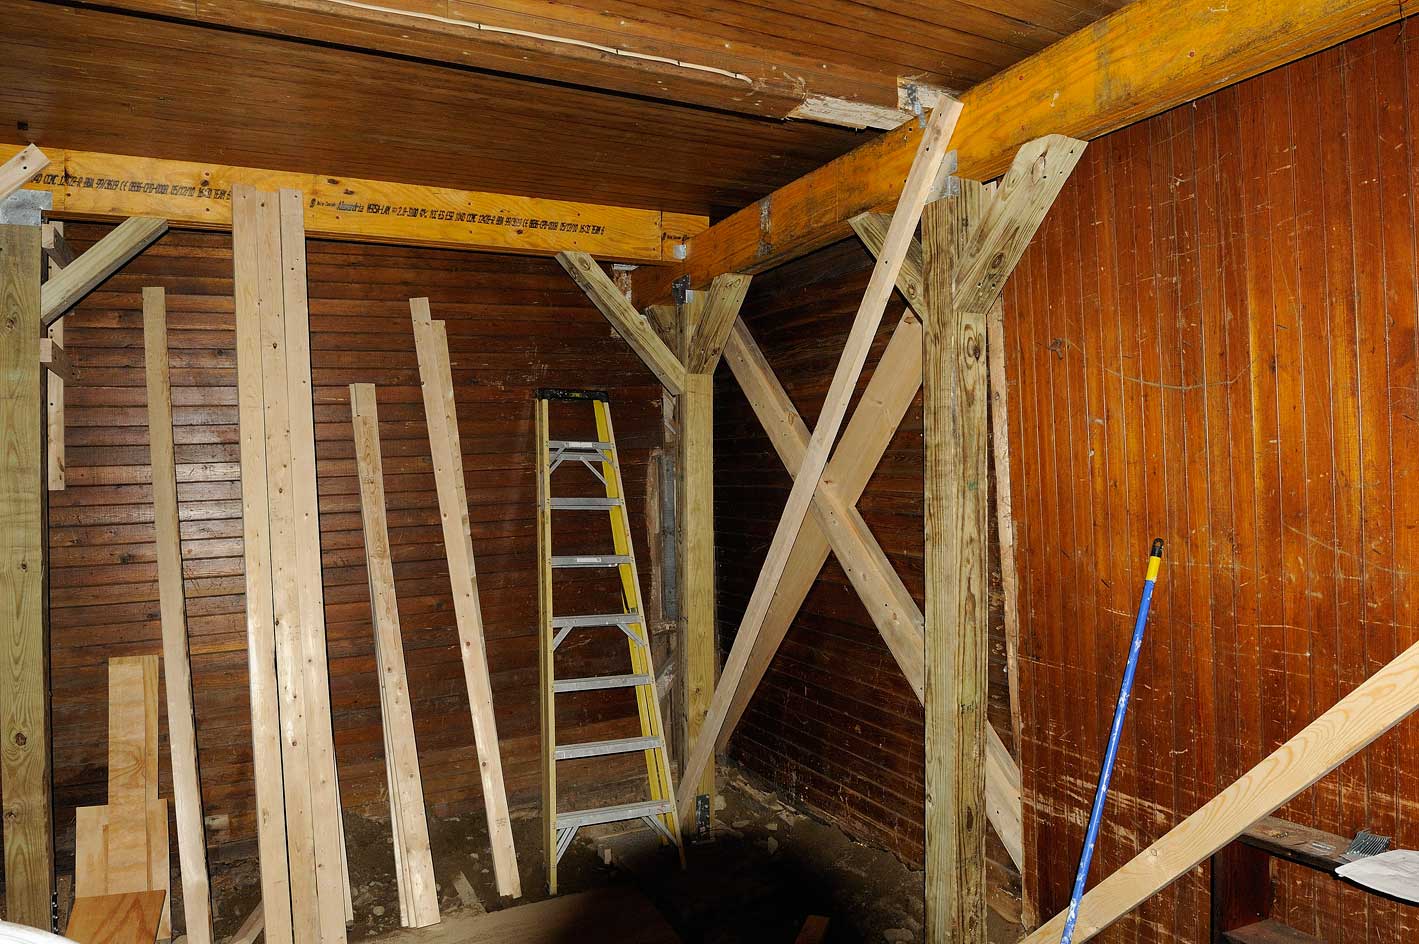
First, an apology: A weblog without photos is an impoverished thing. However, the concrete truck came at 8am on the morning after Thanksgiving, and we knew that we would only be allowed 15 minutes per yard of concrete, after which we would be charged $3/min. We (John B and I) ended up placing almost 4 yards in a bit less than 45 minutes, and picking up the camera never crossed our minds. Nothing weird or disastrous happened, though, and by Monday morning, we had footings on which to set the remedial framing.
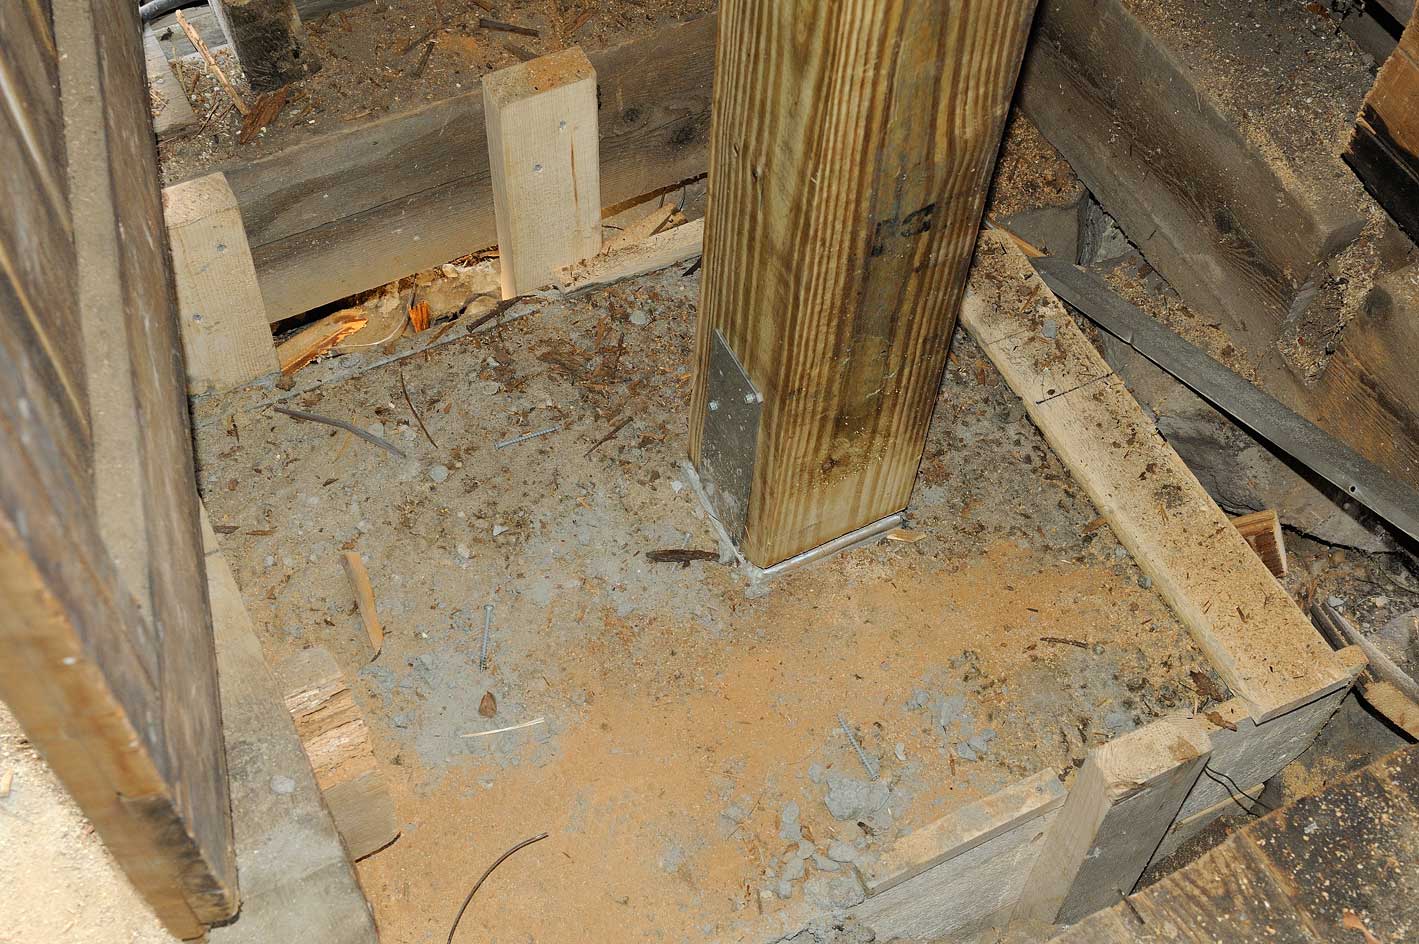
From there, it was just like playing with a big erector set, except that the critical beam was too long to fit into the building the normal way. We ended up cutting a hole in the sidewall to slide it into place.
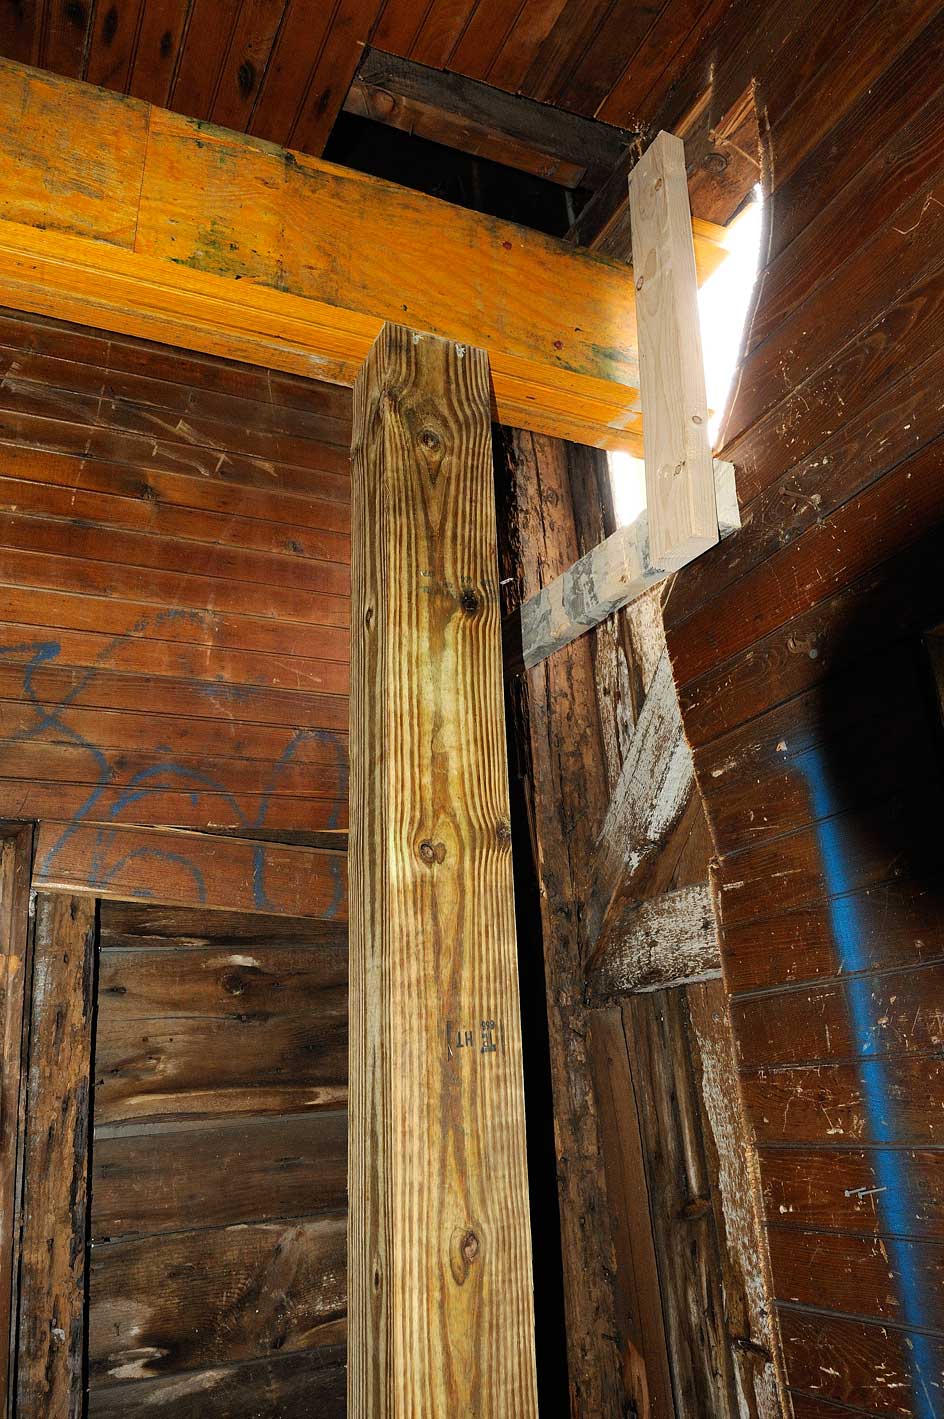
The completed remedial framing:
As we were wrapping up, we realized that the building had claimed at least one victim.

Tagged: carriage house, dead bird, footing, LVL, Milton, structural work
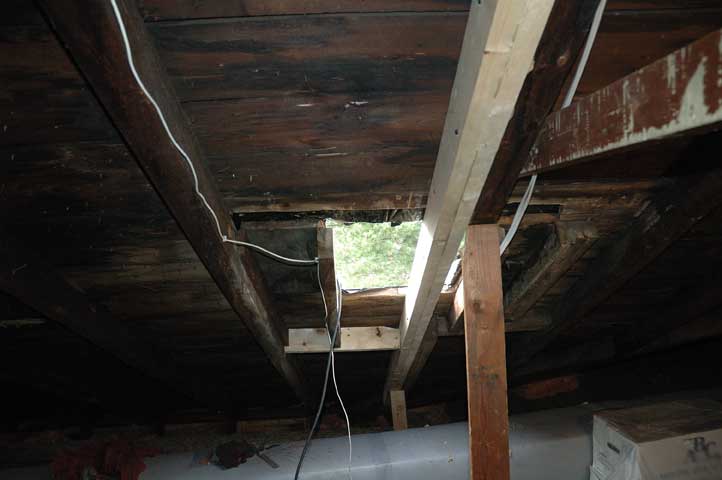
The chimney wasn’t so good.
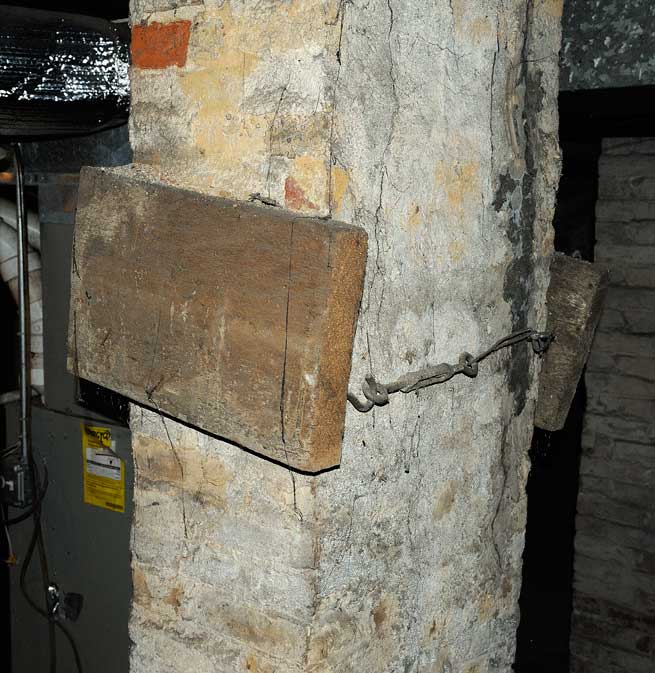
It was failing structurally, and someone had made a half-hearted attempt to splint it back into soundness with a couple blocks of wood, screw hooks, and a turnbuckle. It was also on the small side — only 16 inches square, but was supporting large hearths above — and the house was sagging around it.
There was also a question of respect. I make no claims at knowing the electrical code, but I’m pretty sure it’s not recommended to run wires down the center of a chimney.

Given all thie, the clients asked us to remove it, shore up the house around it, and replace the non-functional fireplaces with something more user-friendly.
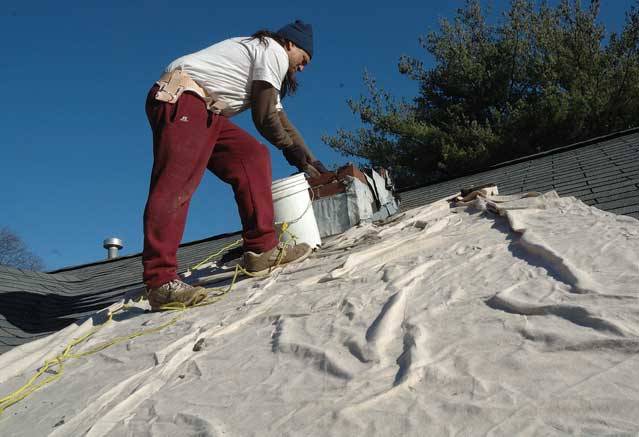
While the weather was still reasonably good, we started taking down the chimney above the roofline and in in the attic.
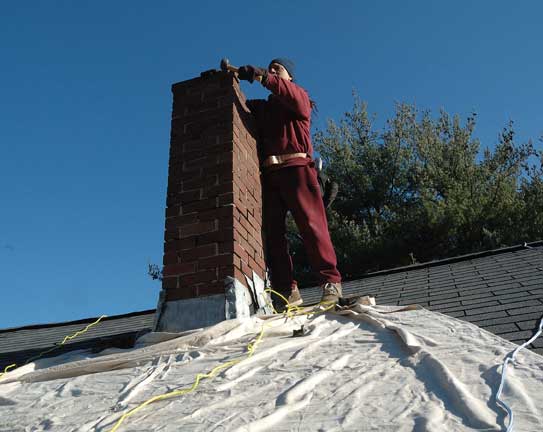
The old thing gave minimal resistance, with nearly all of the mortar gone from the joints.
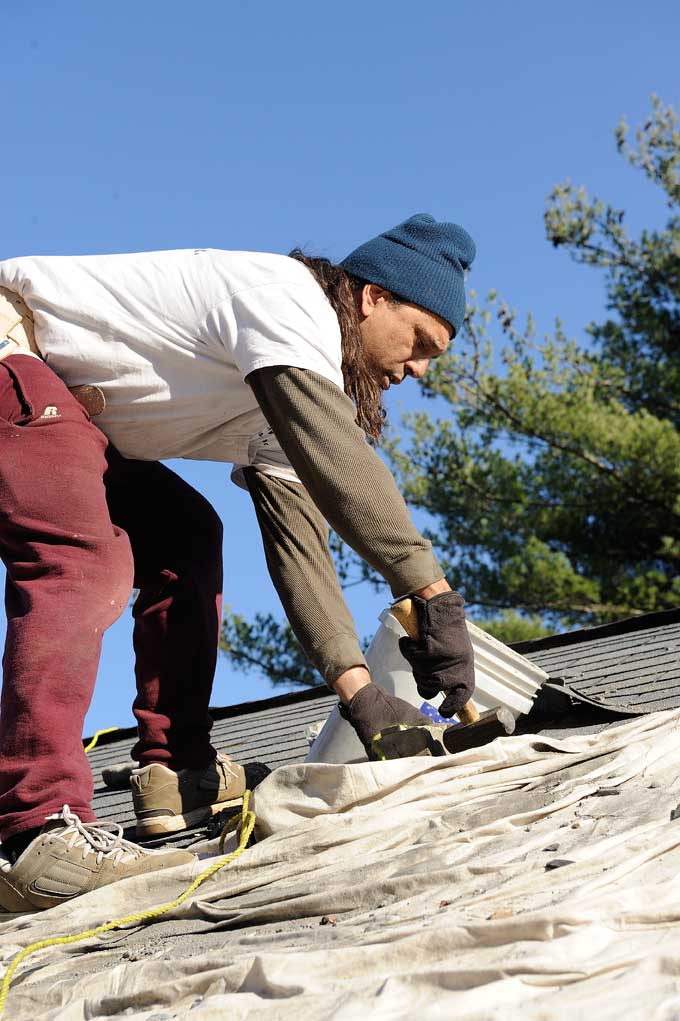

And we added a rafter to make the roof sound in the chimney’s absence.
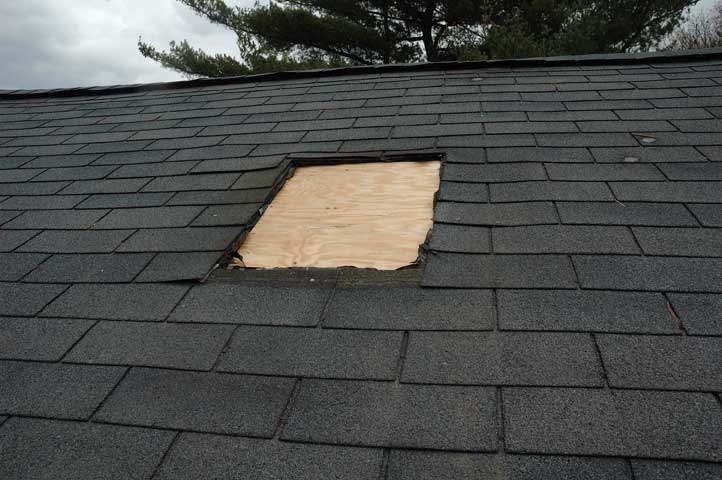
After we patched the roof, we were feeling good about the job — no leaks, no mess, no accidents. And then I got the call: The homeowner said that she had been putting her 3-year-old daughter to bed, and she kept asking “when’s Milton putting back the chimney?” Her mom told her that we would be back after the holidays to continue the work, but her daughter kept insisting “but he’s gonna put the chimney back, right?” After Mom made a couple more confused attempts to explain the nature of construction schedules, her daughter blurted out, “How’s Santa going to get in?!” Oops.
Musti and Luc, on the clock.