
Cheating?
Posted on 26 August 2013
Regular readers of this weblog will have gathered that we don’t usually shirk difficult tasks; some might suggest that we tend instead to the masochistic. I’m not incapable, though, of considering where our efforts might best be expended.
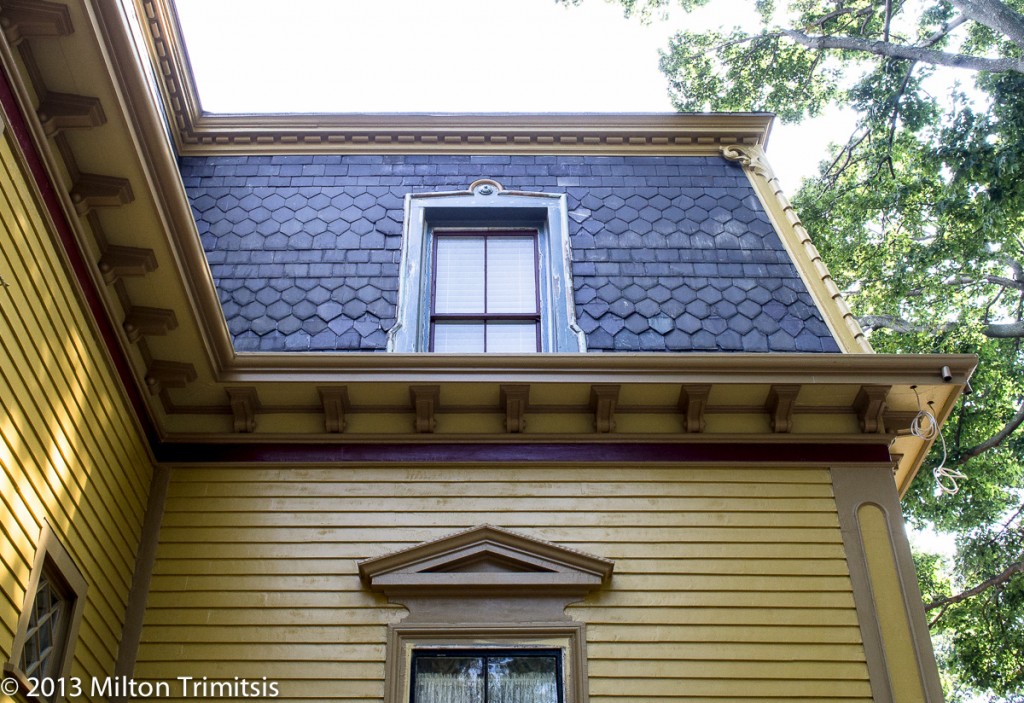
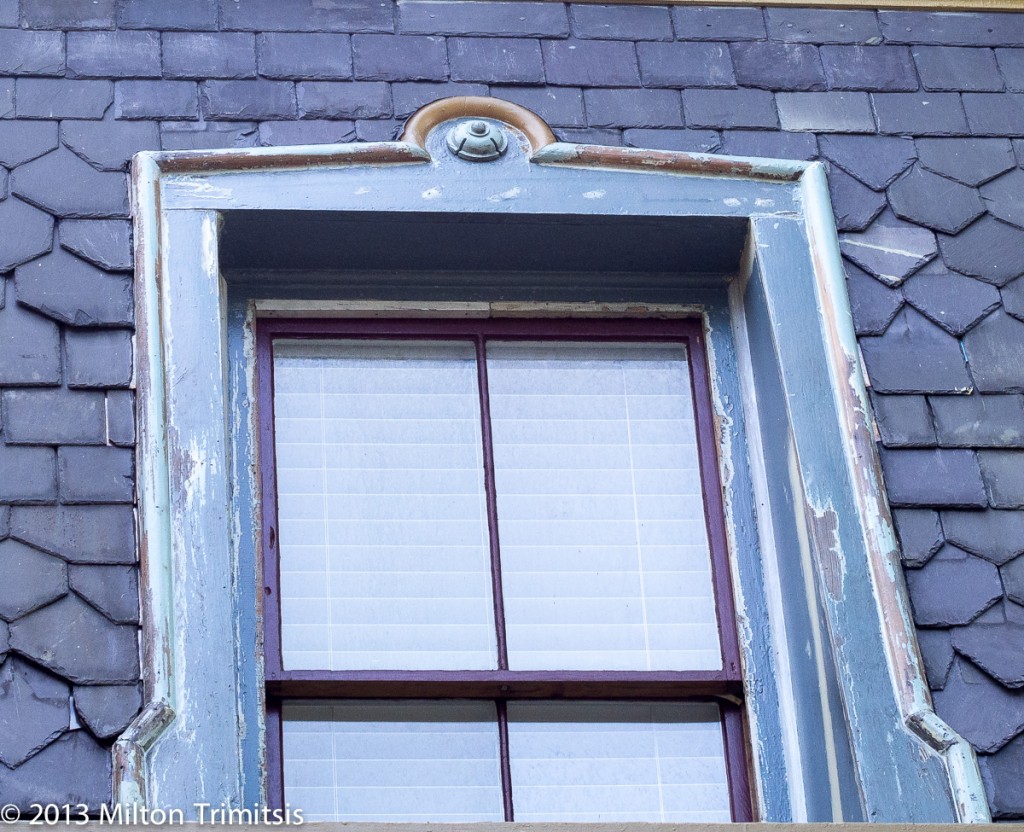
We’ve been working on an exterior restoration project on an early Victorian house in the Ashmont Hill section of Dorchester. One of the last remaining tasks was to reproduce two small curved molding elements that recurred many times around the house. Something like half of the existing pieces, about 8 of each profile, were too crumbly or rotten for the painters to work with. We removed an intact sample of each and considered our options.
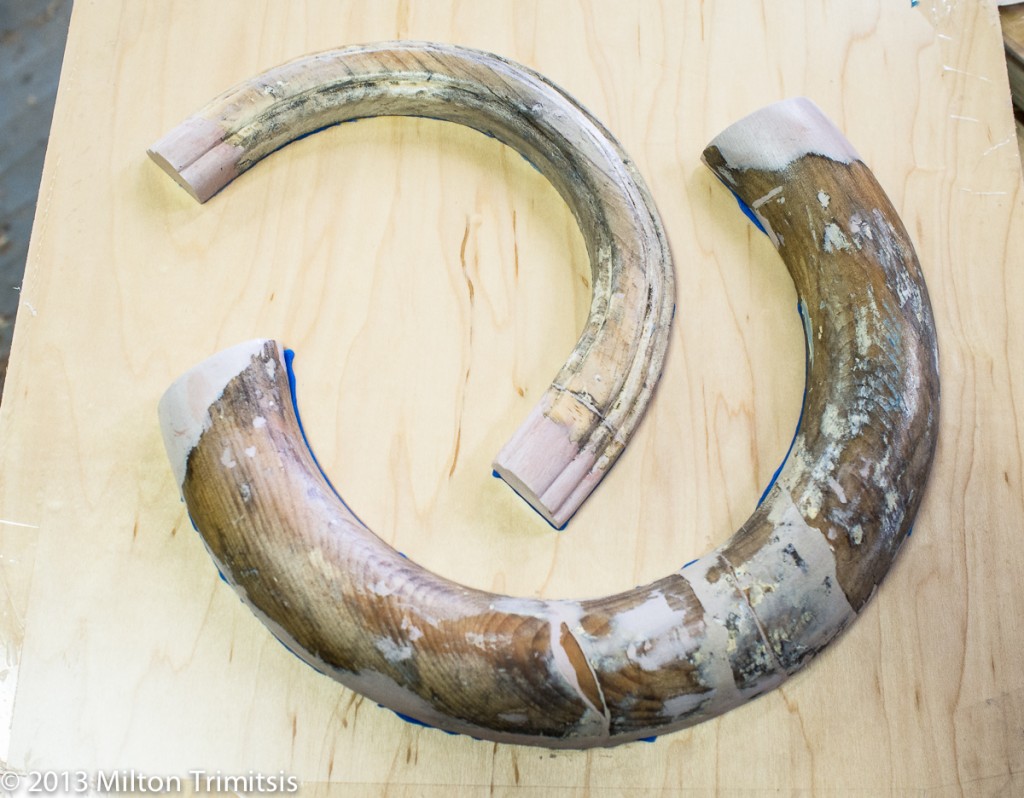
The original parts had been sawn out of solid wood before they were profiled, a relatively efficient way to make curved blanks. However, this leaves the parts inherently weak, as the wood grain does not follow the curve of the molding, and in fact, many of the existing pieces had failed where the wood grain was perpendicular to the curve. The other, more time-consuming (read masochistic) way to make the blanks is to glue them up from thin bendable strips of wood that follow the curve. This method yields strong, durable parts, but the work might have taken us a week or more.
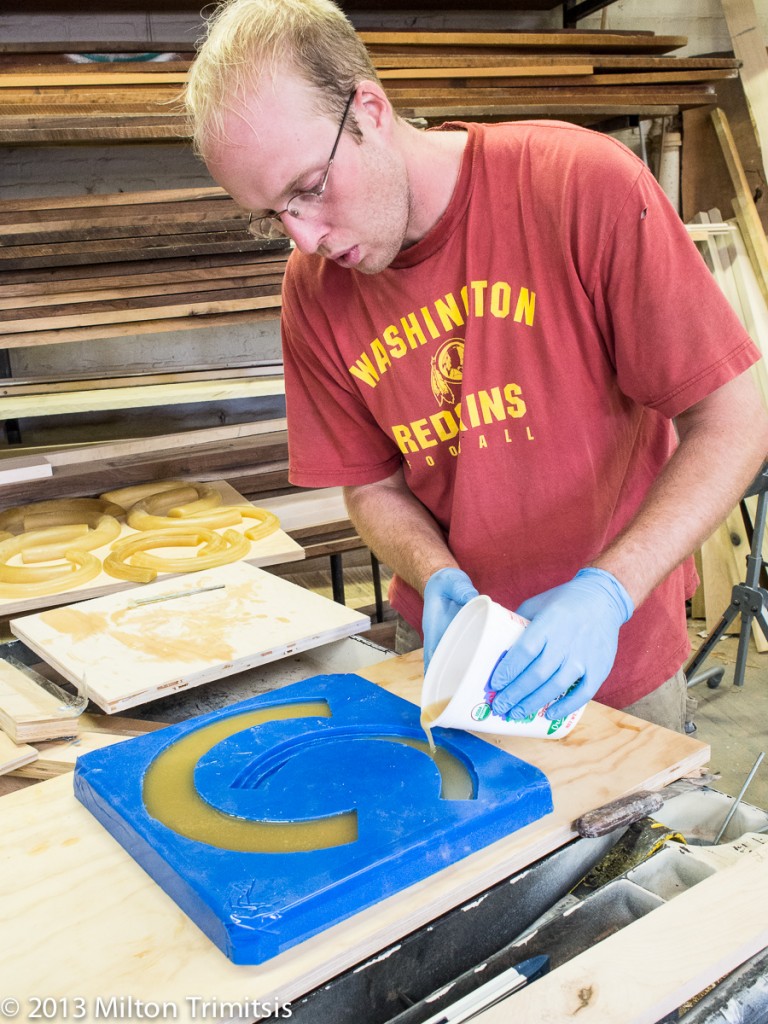
For some time, I’ve been interested in exploring the possibility of making a mold of small parts like these and then casting as many duplicates as we needed. Until now I had never put in the time to figure out how to actually do it, but this project pushed me over the edge. After several sessions of unilluminating online research, I found a company called Reynolds Advanced Materials that seemed to specialize in selling exactly the sorts of materials I was looking for, and, joy(!), they had a location in Boston. Their staff were exceedingly helpful in sorting out which of the many possible mold-making and casting materials were best for this application, and I left with heavy boxes and uncommon optimism.
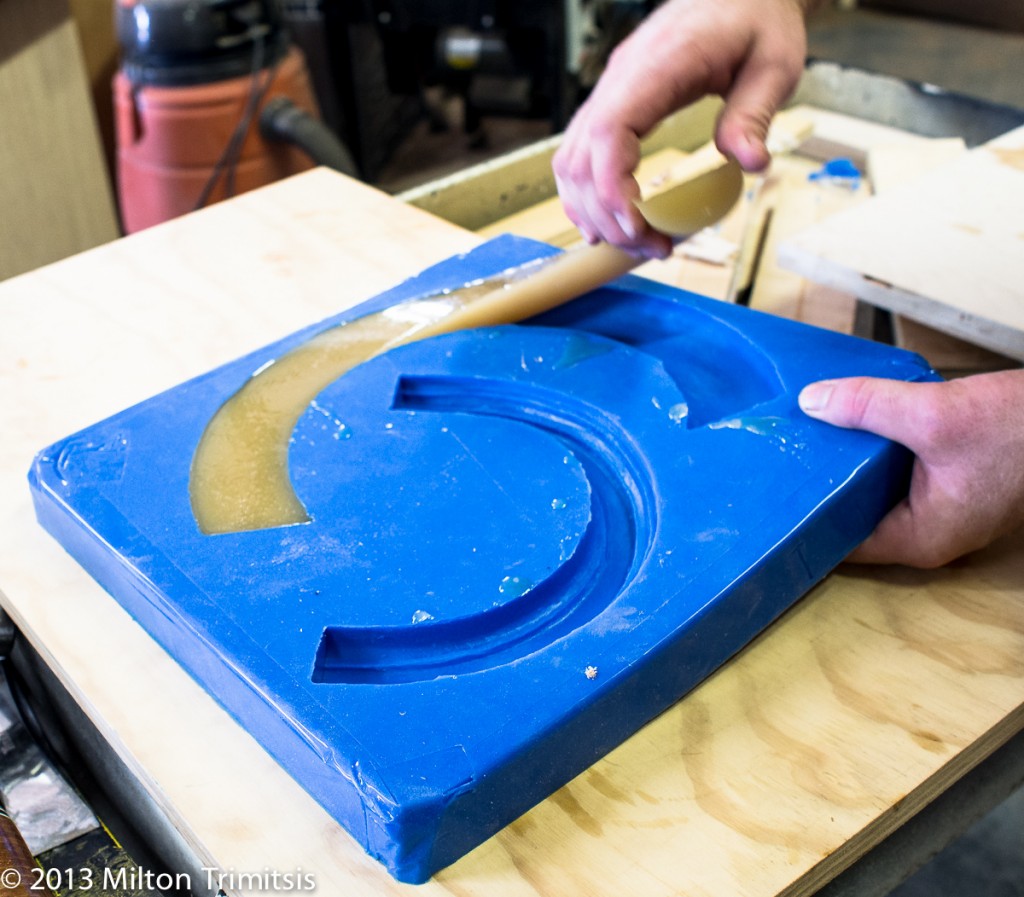
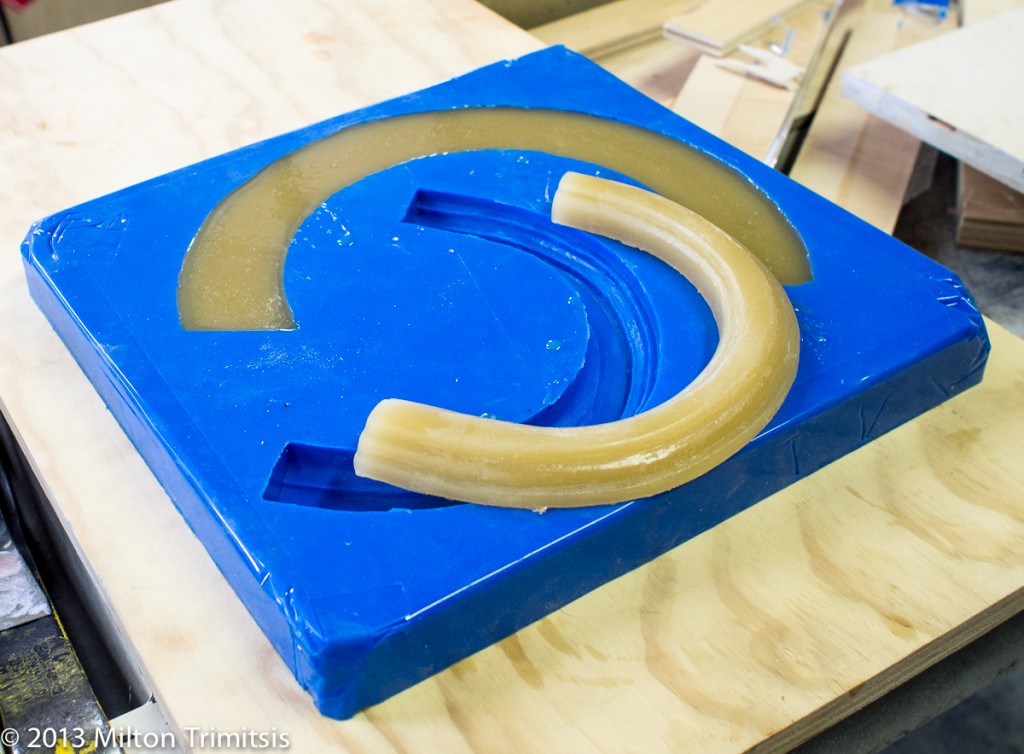
Hobbs, one of my newest colleagues, agreed to be the guinea pig with the unfamiliar materials. He made a silicone mold of the original parts on one day, and cast all of the reproductions the next.
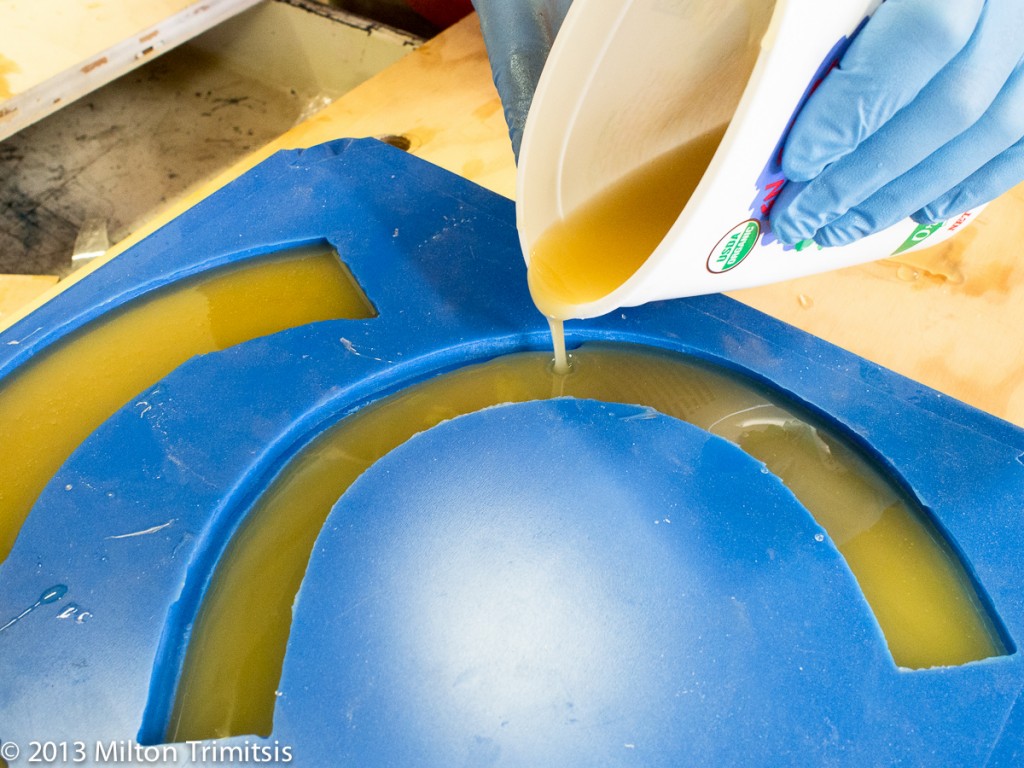
The 30-minute cure time of the urethane resin made the casting work go quickly and smoothly.
A day later, the reproductions had been installed on the house, awaiting paint.
We chose to use a semi-rigid urethane for the cast parts so that we could nail them in place without danger of their shattering. An unanticipated benefit is that finish nails shot into the molding with a pneumatic gun disappear below the surface, and the plastic seems to seal behind them.
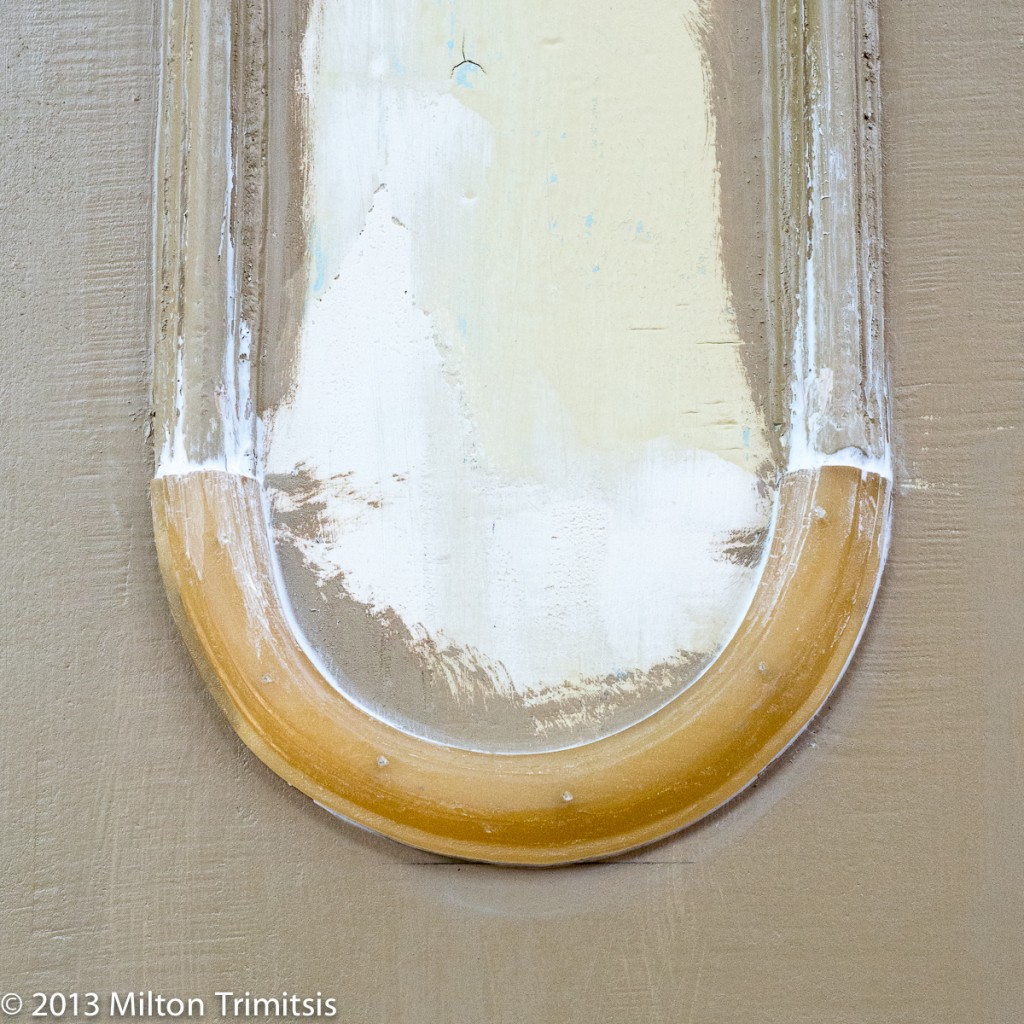
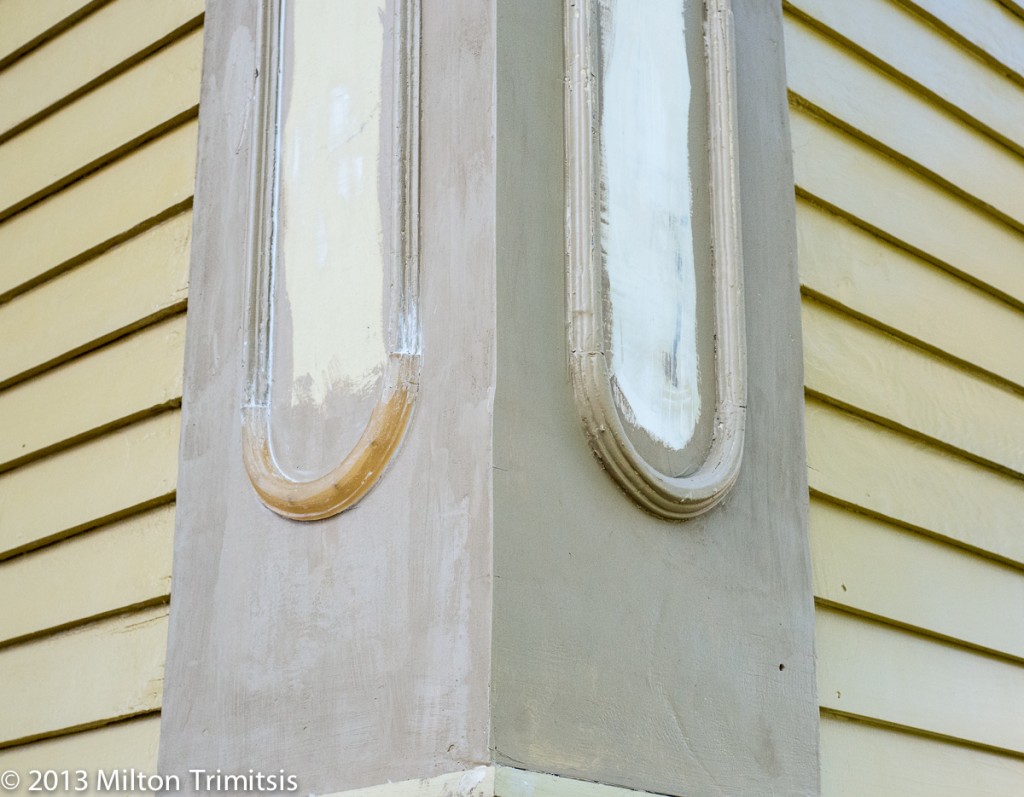
Here’s an instance where the original and the reproduction are adjacent:
The total cost for the molding-and-casting approach ended up at less than 25% of the projected cost of making the parts in wood. I think the outcome is good, the client is happy, and my conscience is quiet.
Tagged: casting, conscience, curved work, Hobbs, Molding, Reynolds Advanced Materials
Love the blog…thanks for preserving our neighborhood and sharing your knowledge. Just passed the site on to my buddy Tommy : https://www.facebook.com/RoughCutTv
Thanks for the kind words! Tommy and I were at North Bennett Street School at the same time, though I’m not sure he’d remember me.